Want a more productive garden? How, why and when to test your soil
If I only had one piece of gardening advice to give this spring, it would be to test your soil. While it’s helpful to have a soil analysis to determine nutrient levels, knowing the soil PH is most useful because it directly impacts the health and performance of your plants. Simply put, PH refers to the acidity or alkalinity of the soil. When the PH is too high or low, plants can’t utilize essential nutrients for growth.
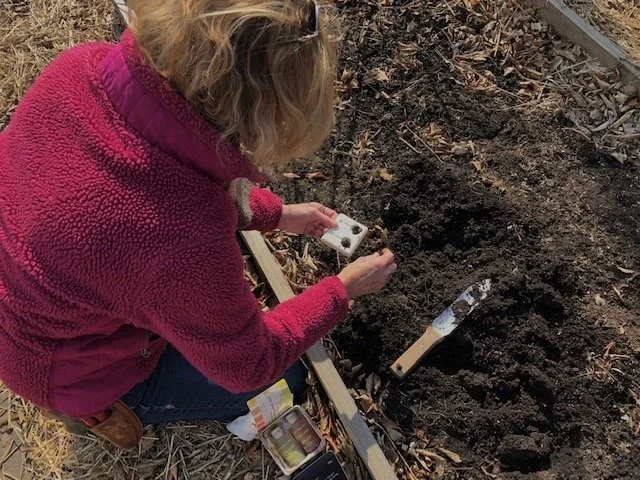
It has a way of sneaking up on you. Case in point - my vegetable garden (below photo). When I tested it several years ago the PH was between 6.0-7.0, perfect for growing most veggies. But last summer I noticed the tomatoes looked stunted, leaves yellowed and fruit was less abundant. Harvests from peppers, lettuces, peas and beans were disappointing as well. All symptoms pointed to a PH imbalance, so I tested it again last week. Sure enough, I got a reading of 7.5 - way too alkaline. I suspect that my continual top-dressing with compost and other organic material contributed to this.
It’s easy enough to remedy imbalances once you know what you’re dealing with, which is why a soil test is in order. I wanted results fast so I used a home test I ordered from Cornell Master Gardeners.

Soil testing options:
I found home testing easy but if you’re unsure about doing your own, another option is to send your sample to a reputable lab that specializes in soil testing or your state’s extension offices (Cornell Master Gardeners NY) for an analysis. Programs like the Tertill Garden Program include a laboratory soil test and have the added bonus of shipping the fertilizers you need right to your door.

How to test:
Soil samples should be dry. I collected one from each bed (I had 4) and labelled them to avoid confusion. Barbara Shea, Director of Marketing from Tertill weighs in on the best practices for getting a soil sample:
Dig 6-10 small holes about six to eight inches deep in different parts of the garden or lawn you want to test.
Test one area at a time. If you are testing your lawn, don’t include soil from your garden and vice versa.
Use a clean trowel and pail to collect each area.
Avoid including samples from unusual spots like under eaves, near brush piles or next to compost piles.
Remove grass, mulch or debris before sending in the sample.
If the soil needs to be dry, spread it on paper and let it air dry. Do not dry the soil in an oven or microwave because this changes the chemistry in the soil.
Repeat these steps for each planting area (lawn, garden, orchard) you want to test.
Multiple samples can usually be submitted for testing, such as your lawn and your garden. Be sure to accurately label and identify each bag.
Usually a lab will require 1-2 cups of soil.
You don’t need a cup of soil if you’re doing a home test - just enough to fill in the little containers (below) with soil.
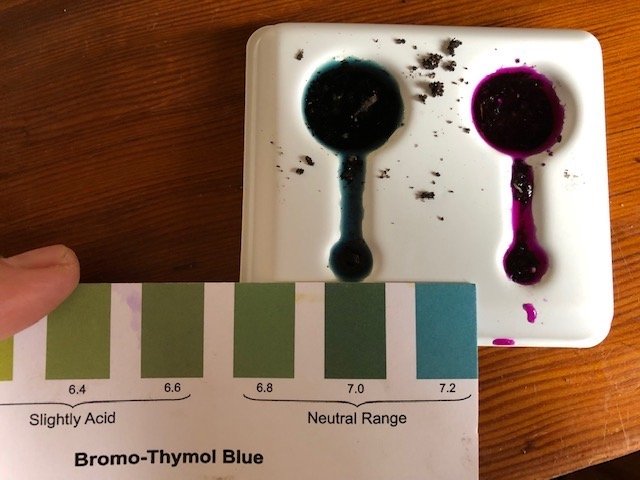
Below are the two indicators that you add to the samples. You have to wait a minute or so before reading results.

You can see below that the PH level in this bed reads 7.2 - a little too alkaline for most vegetables. A normal range for most crops is in the 6.0-7.0 range. A reading below 7 is acidic and any pH above 7 is alkaline. A pH of 7 indicates a neutral soil.

How to raise or lower the soil PH:

To lower PH (reduce alkalinity) apply Soil Sulfur, or Aluminum Sulfate and follow the application directions according to square footage of the bed. Work it into the top of the soil - I used an iron rake.

To raise PH to increase alkalinity, spread ground garden lime as directed per square footage.

Pieris japonica ‘Mt Fire’ (Andromeda)
PH problems don’t just show up in vegetable and flower gardens. See those yellowing leaves in the above photo? Testing showed a PH of 7.2, way too alkaline for this acid loving shrub. Sulfur or aluminum sulfate will correct the problem.
Soil texture:
The texture of your soil - sand, silt, loam or clay will have an impact on any treatment. According to Nellie Gardner, agronomist and cut flower grower, lighter soils have a lower cation exchange capacity so require less sulfur (lower pH) or lime (raise the pH) to change the soil chemistry. Because of leaching, sandy soils often are harder to neutralize and require more frequent treatment.
Heavier soils hold more nutrients than sandy soil, so they take more sulphur or lime, they are also more stable because they don’t leach quickly.
Below is a guideline to identifying soil texture: (Cornell Master Gardeners)
Texture:
Sandy = Does not conform to a ball easily, sandy to touch, sand grains visible Loam = Conforms to a ball, spongy, smooth feel, no sandiness, or silkiness Silty = Conforms to a ball, very smooth to silky.
Clay = Conforms to a plastic feeling ball, smooth, easy to manipulate.
Drainage:
Excellent = No issues, hardly ever any puddling Good = Drains well, normally does not puddle up Fair = Drains OK, but with puddling.
Poor = Drains poorly, noticeable puddling.
How long does it take to see results?
According to my understanding, it takes 6-8 weeks to see results. Ideally I should have tested my beds in the fall, but I think there’s still enough time before planting. I agree with Barbara’s comments, ‘traditional amendments used to change your PH level, like lime and sulfur, can start working almost immediately, but the whole process goes on for weeks, even months.”
Do you test the soil again after you’ve amended it?
Testing again after several months allows you to assess whether what you did was enough to raise or lower the PH. Regular testing is a good idea too, especially if you use compost and other organic matter. I’ve noticed that my continued top-dressing of compost and mulch changes the PH levels. Barbara adds, “If you are using compost or other unverified amendments, consider testing every two years instead of three.”
Soil tests are kind of like getting bloodwork done - they help you diagnose the problem so you can treat it appropriately. After all, why guess at what’s going on?