Growing Up: How To Cram More Plants Into Less Space
I’ve spent the past month nursing lettuce seedlings in the spare room, eagerly planning this year’s vegetable garden. With a small garden like mine, you’d think the planning part would be a no brainer. After all, how many vegetables can one possibly cram into three raised beds? The answer is plenty - with efficient trellising.
I got this idea from a much bigger garden. The Pounder Vegetable Garden (below) at Cornell Botanic Gardens opened my eyes to the virtues of growing up. Space isn’t an issue here, but tomatoes, pole beans, peas, squash and cucumbers are all trained over cattle panel arches. The fruit literally drips off the vine as you walk under it. How romantic is that? I was impressed with the beauty, productivity, and efficient use of space. The arbors are inexpensive to construct too.

Determined to try this, I tracked down cattle panel, a heavy duty 6x6” galvanized wire used for fencing livestock. It’s easily purchased at hardware and feed supply stores. I got mine at Tractor Supply. It comes in 16 ft lengths that are 50” wide. It’s too unwieldy to fit in the car, so we lugged ours home in a small pickup truck.
After studying some YouTube videos, it seemed pretty easy, but when we got started we discovered a few key things that weren’t mentioned. Here’s how we did it.
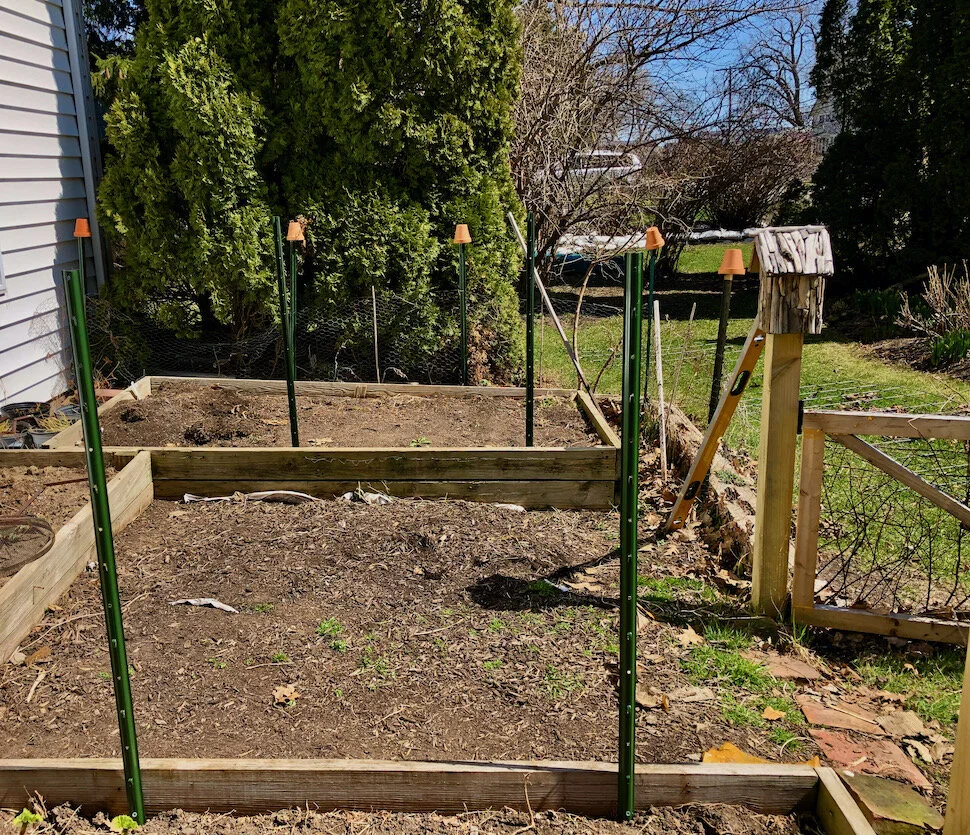
1.Posts: We purchased four 7 foot studded T Posts at Tractor Supply and pounded them firmly into the ground inside the raised bed. These are the foundation for the arch, so you want them to be solid.
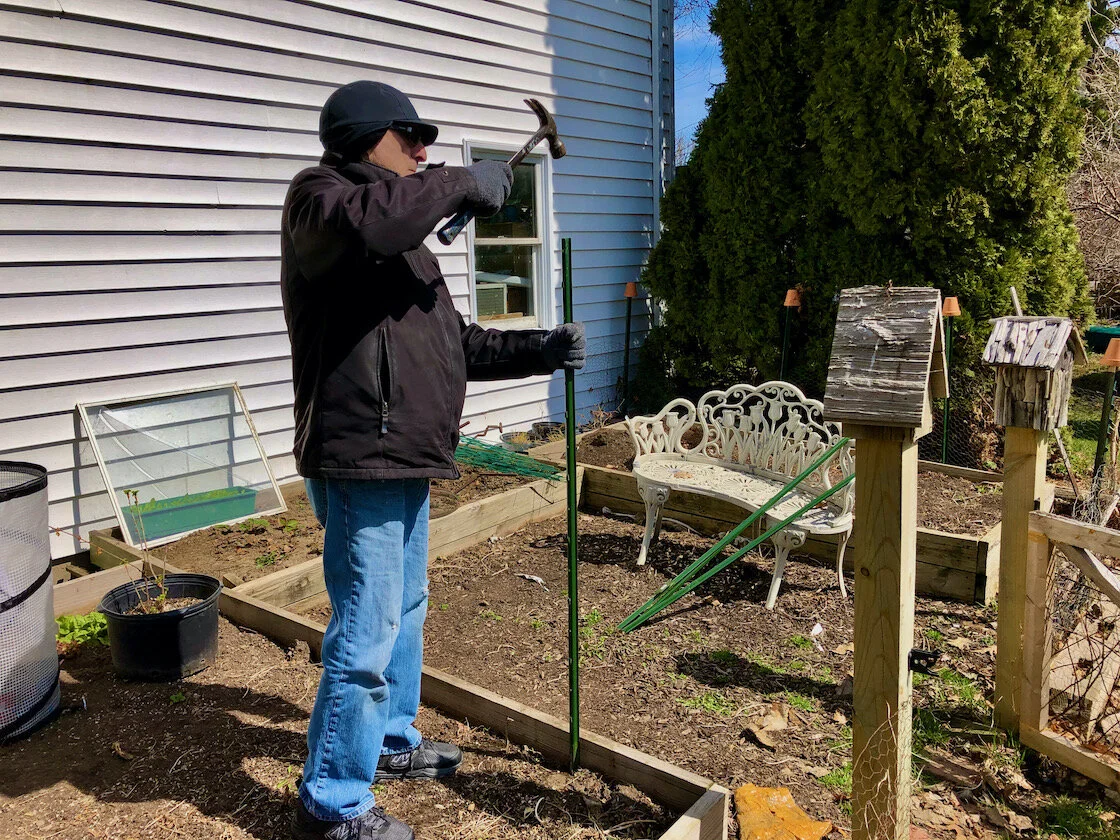
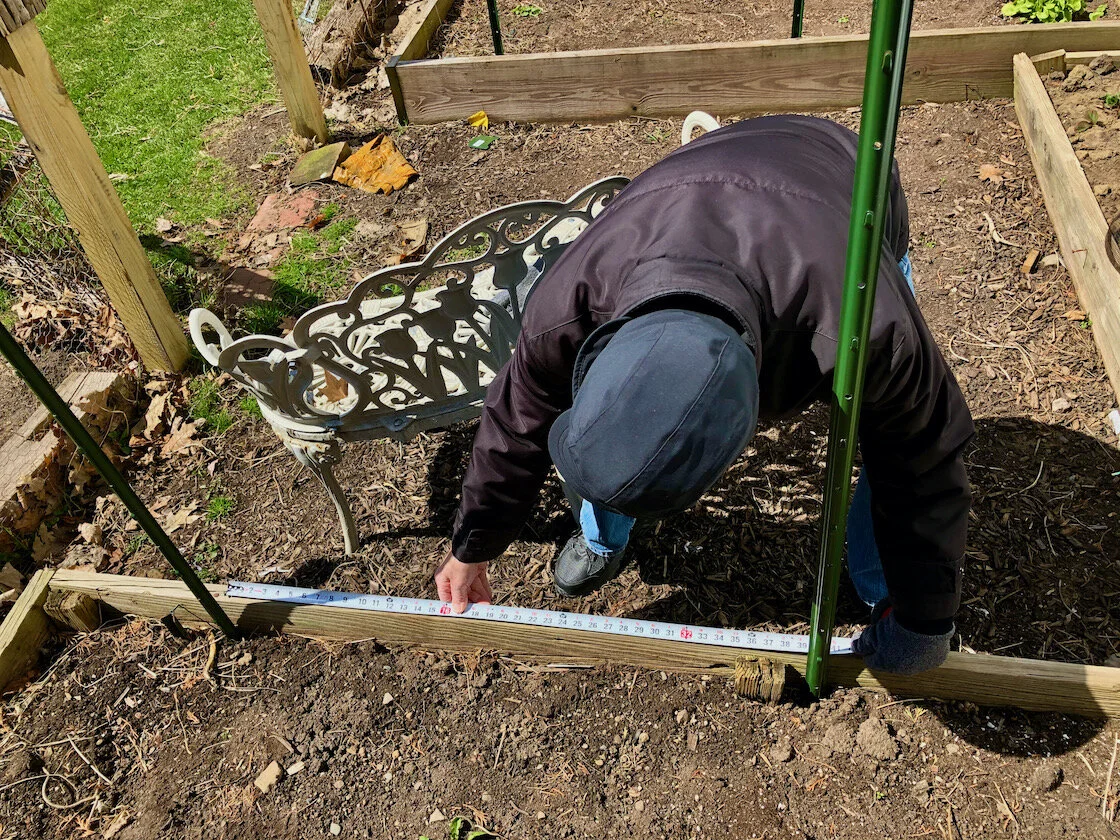
2.Measure: The space between the posts on each side should match. The width of the wire is 50,” so we left 40” between the poles - an extra 5” on the outside of the posts. The cattle panel is 16 ft. long. The space between the two beds measures 7 ft., the height of the arbor is 80.” Between 6-8 ft should give you the best result. You wouldn’t want to go beyond 8ft or the arbor will be too low.
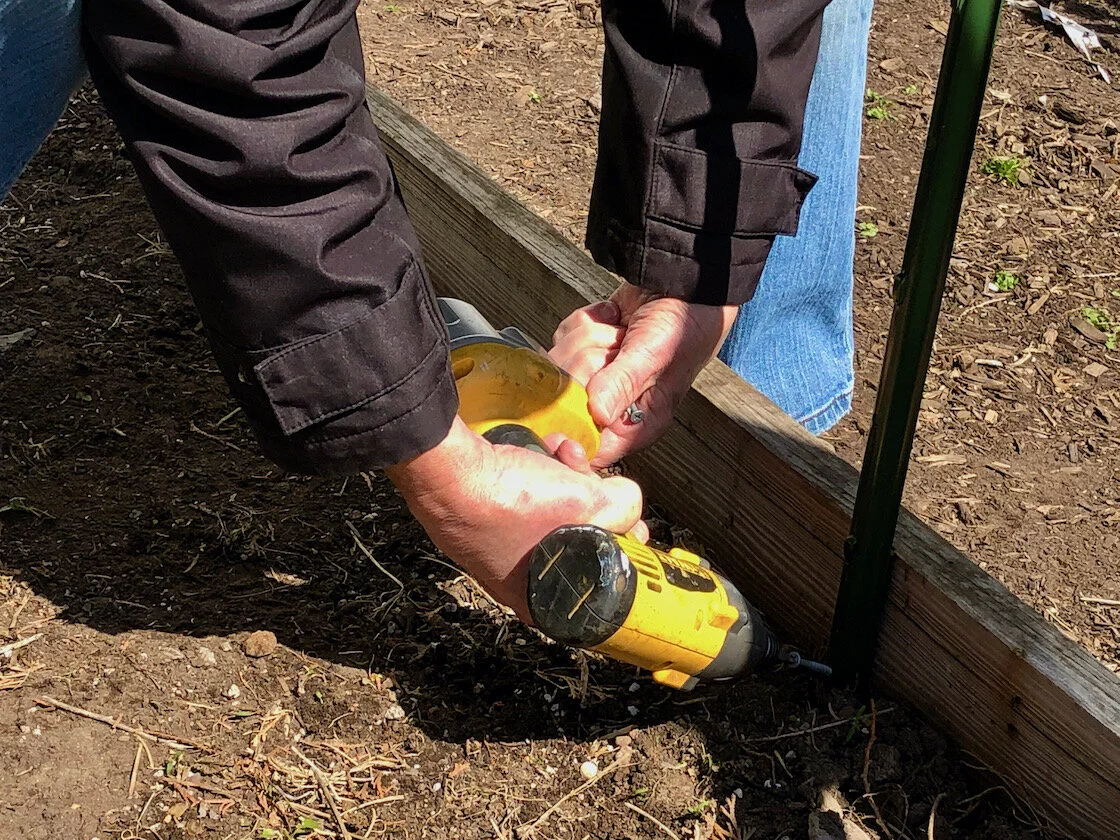
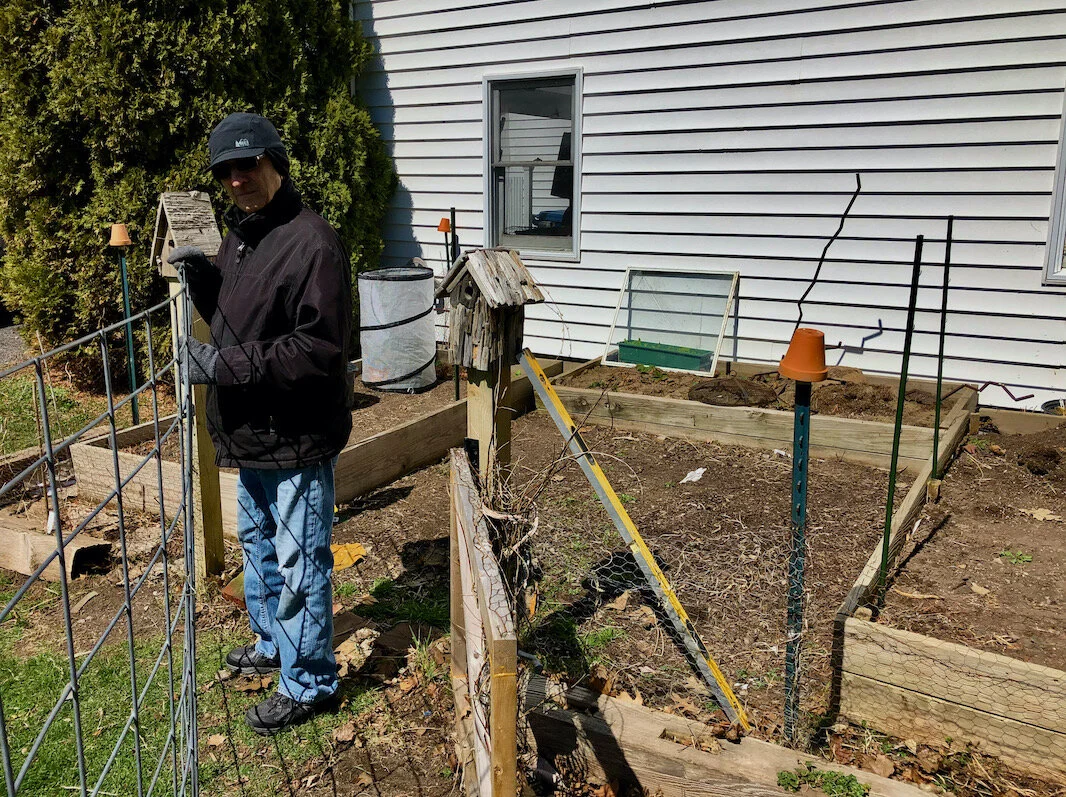
3.Secure poles: My husband Phil screwed the poles to the inside of the raised bed for extra strength.
This is what it looked like when we were finished. He used a level to make sure the posts were straight. You can see the cattle panel laying on the grass on the right.
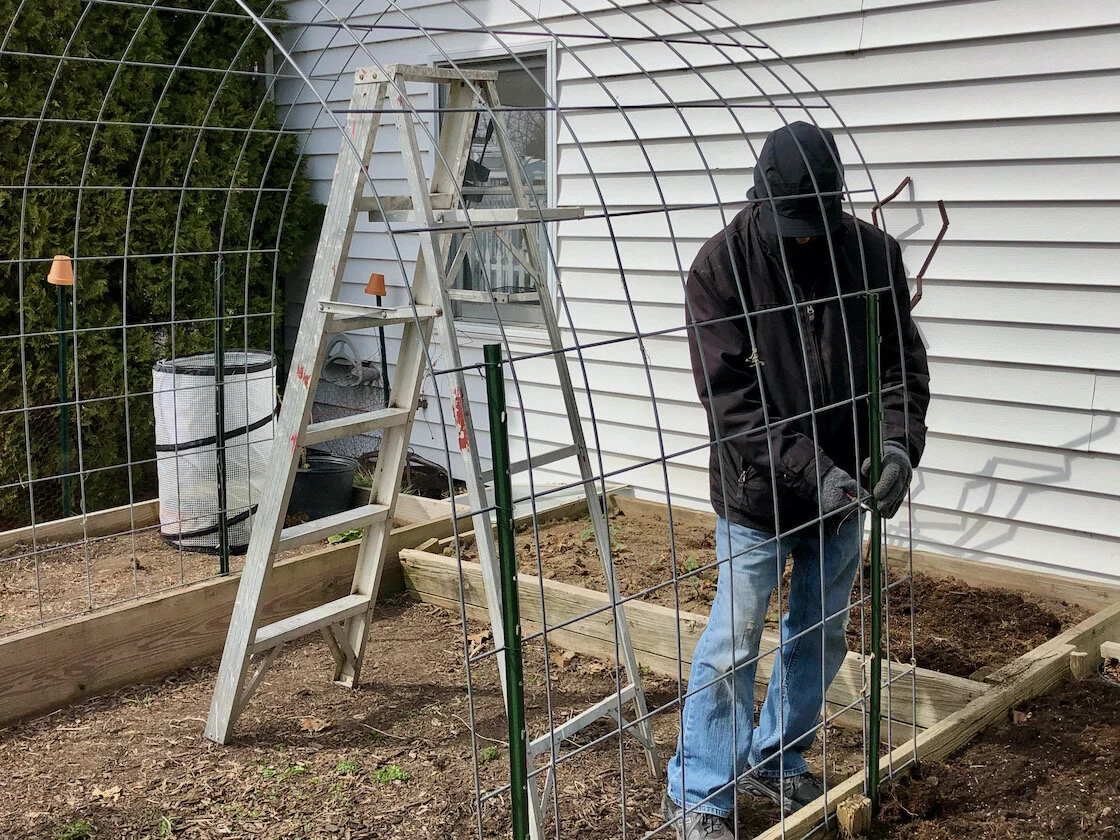
4.Set up the panel: The cattle panel a bit heavy and unwieldy - it takes two people to move it into place. Warning - expect yelling here!
Using the ladder to support bending the panel in the middle made the job easier while we maneuvered it into place. Phil secured one side first by twisting heavy duty wire through the hole in the post and tying it around the cattle panel. He did this at the top, middle and bottom on both sides.
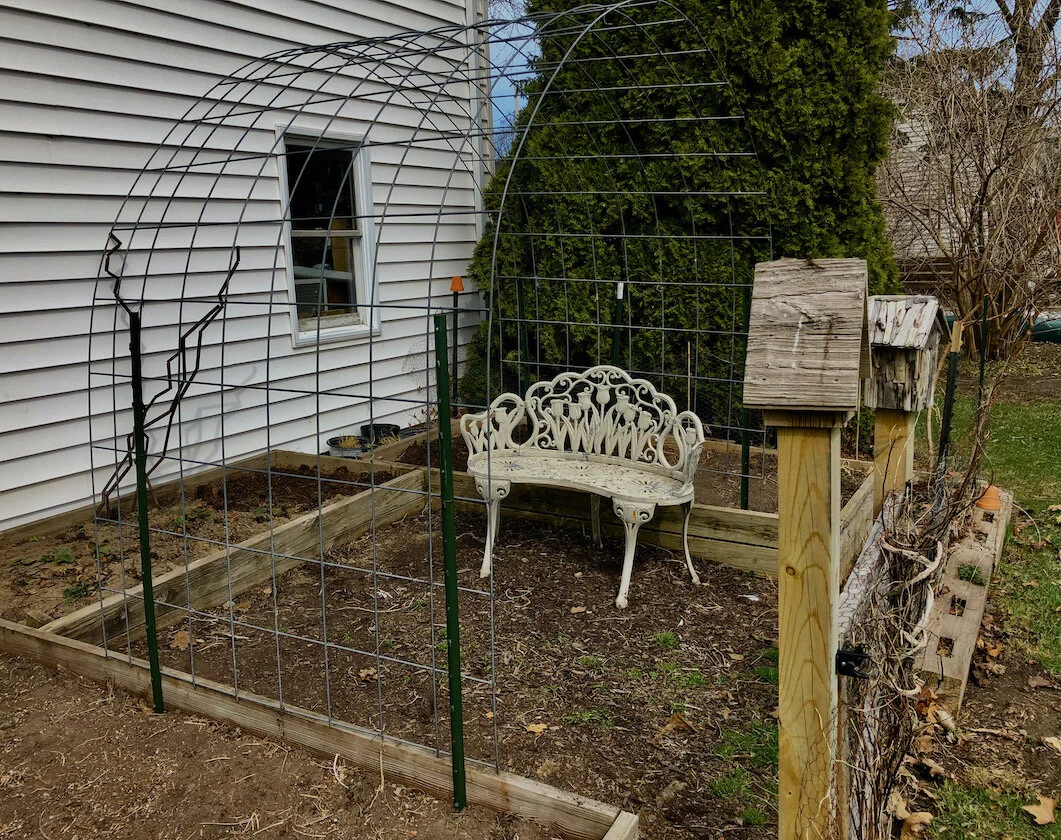
5. Finished arch: Below is the finished arch, ready to plant. We had a hard time making a perfect arc - pulling down on the middle helped.
I never would have ever been able to fit peas into this garden unless I trellised them over this arbor. So far, I’ve grown tomatoes, cucumbers and squash on it. You can grow more than one type of crop together. Using vertical space leaves room in the beds for lettuces, spinach, herbs, peppers, eggplants and root crops.
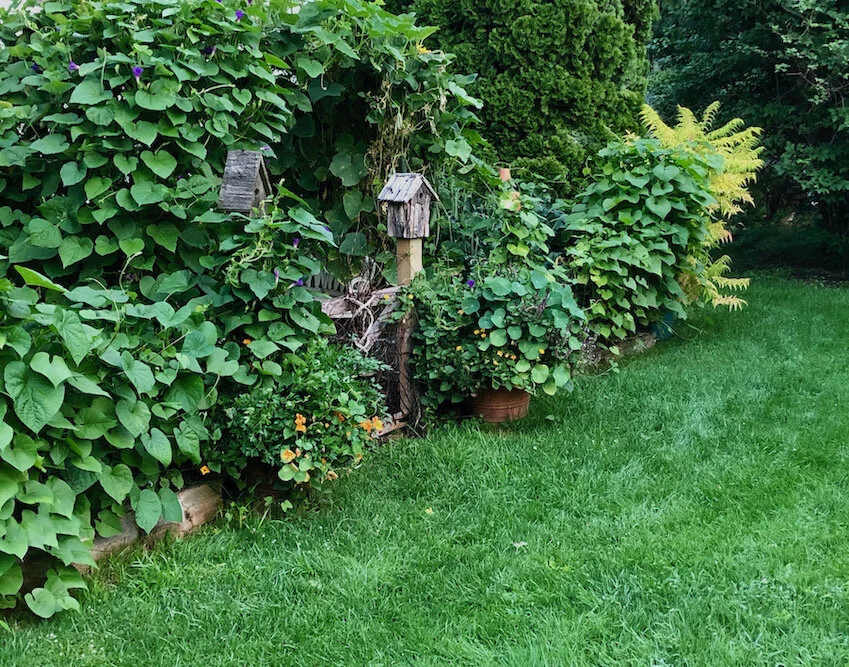
The whole thing looked pretty utilitarian until the plants grew in, but voila - I have a cozy little nook to sit under and a shady spot to stash plants that need protection.

It provides a much grander entrance into my little garden too. Yes, I got a little carried away when I added the morning glories. It looks like a hobbit house. Maybe I’ll grow something less aggressive and more flowerful this year!