It's Out Of Hand! Tips for Keeping Hedges In Check
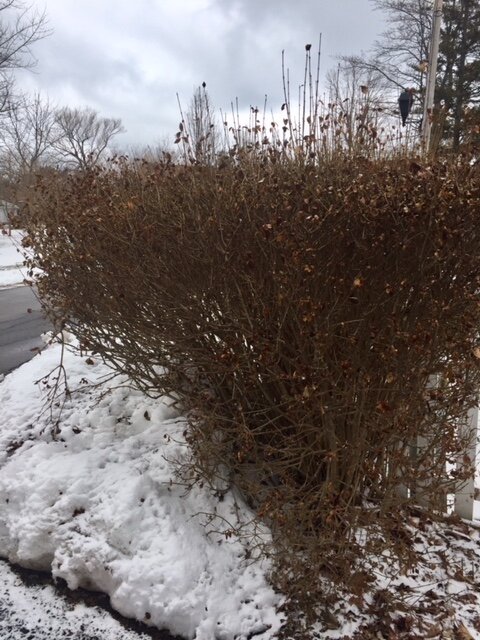
It seems no matter how often or well you shear a hedge, it will slowly expand in height and width over time. I've been eying this privet hedge all winter, itching for the snow to melt so I could prune it.
Last summer, my friend Linda and I spent a backbreaking day shearing it. I can no longer reach across the top with the 28" hedge clippers, so I have to climb up a ladder and tackle it from both sides. At the end of the day, I knew I it was time for drastic measures.

Just how drastic, I wasn't sure. I decided to call my friend Mark Ripepi for some advice and a little hand holding. He's a talented garden designer and an expert on the art of hedges - take a look at his photos and you'll see why I called him. He laughed, "I just rape them. Seriously, sometimes you have to bite the bullet and initiate a “hard pruning." That means taking feet of height off the top and/or reducing width. "There is no reason in the world that a hedge of 8’ in height has to be any wider than 2’ in width, he told me, and with deciduous hedges I’m not adverse to using a chainsaw, particularly on the sides." Deciduous hedges can be hard pruned in early spring, mid summer, or late fall.
What about evergreens? "You can use this method with evergreens too, Mark says, but your window of time is shorter. Yew, hemlock boxwood and holly can be pruned hard, but you'll need to shear them before new growth starts - around mid April. By mid May and early June they'll fill in and look perfect."
Although he likes the chainsaw method, Mark uses loppers for evergreen hedges because chainsaw lubricating oil from the blade will burn evergreen needles or leaves.
His diagram explains the problem and solution in a way that's easy to follow.

Got it - no mercy. I have my work cut out for me. As you can see here, this sucker is way more than 2 feet wide and all of the growth is at the top. It's way out of scale with the house and garden.

Opening them up, removing dead wood and shaping them slightly inward will encourage new growth.
Step 1:
I used my handsaw and a pair of loppers to remove the forward growing branches at the bottom of the hedge. I got rid of all the deadwood as I worked.

Step 2:
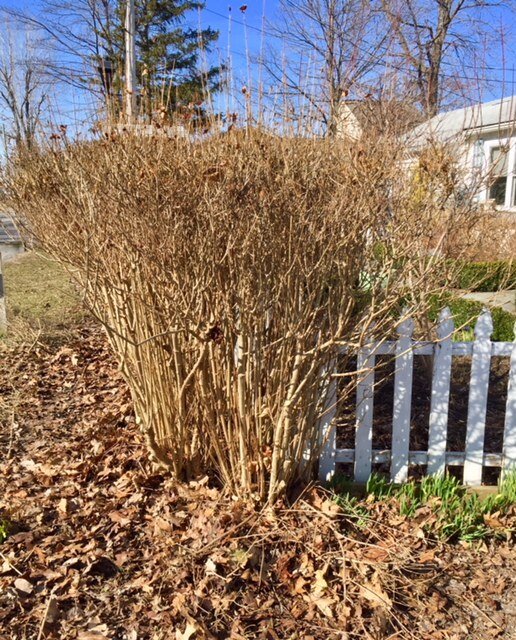
I removed several feet of side growth with a pair of heavy duty loppers and my handsaw. A chainsaw would have been much quicker - now that I know what I'm doing, I'll use it on the next section. Following Mark's advice, I began cutting just above the bottom of the hedge, branch by branch and bringing the line slightly in as I approached the top. You can see how much I've taken off by looking at the second hedge in the background. I need to angle it in toward the top more.

I've pruned this hedge many times, so I felt confident about establishing an even line by eyeballing it.
If you're not familiar with changing the shape or keeping a line straight, follow Mark's method:
Get a camera tripod and set it up next to the hedge.
Take a 2x2 or 2x4 and duct tape it to the top of the tripod and hang a plumb bob at the end.
Stand back and the plumb bob will furnish you with a perfectly straight line which you can work from.
Once you establish the slightly inward angle you can take away the tripod and keep going. Keep looking down the line of hedge to make sure you stay true to the line you have created.
Step 3:
I reduced the width a bit more, using my loppers and evening it out with the hedge clippers. I established a slightly inward angle at the top, which now measures 22" (it was 42").

If you use hedge clippers or a chainsaw you'll have ragged edges, but don't worry about them.

According to Mark, "as you decide how much thickness to remove, remember with privet you will have at least 12”-18" of growth by the end of the next year. After this cut, sometime in late June get out your nice shears and cut almost all of this back to about an inch or two above where you cut in March or April. In a very short time you’ll have what I call “bullet proof hedges”, that are thin and graceful and thicker than ever.“
Don't be afraid to get tough on your hedges to whip them into shape. "Once you get it right,"Mark assured me, you'll have the foundation and maintenance will be easier. Thanks for giving me the courage to give them a little tough love Mark. Maybe I can finally sit down in these chairs this summer!
