Want to take an adventure down the garden path? Outdoor rooms add magic
I recently worked with someone who wanted to incorporate outdoor rooms into her design plan. Why, where and how should you go about creating one? That interaction prompted me to think about my own experience and thought I’d share a few lessons learned.
Outdoor spaces get a lot of attention these days - the appeal of dining alfresco or sipping wine among beds of flowers is pretty irresistible. So is expanding the garden into living space. There are many practical reasons involved, but I’m more interested in how they feel when I’m in them. Conscious planning is only part of it, mostly, it evolves as you go.
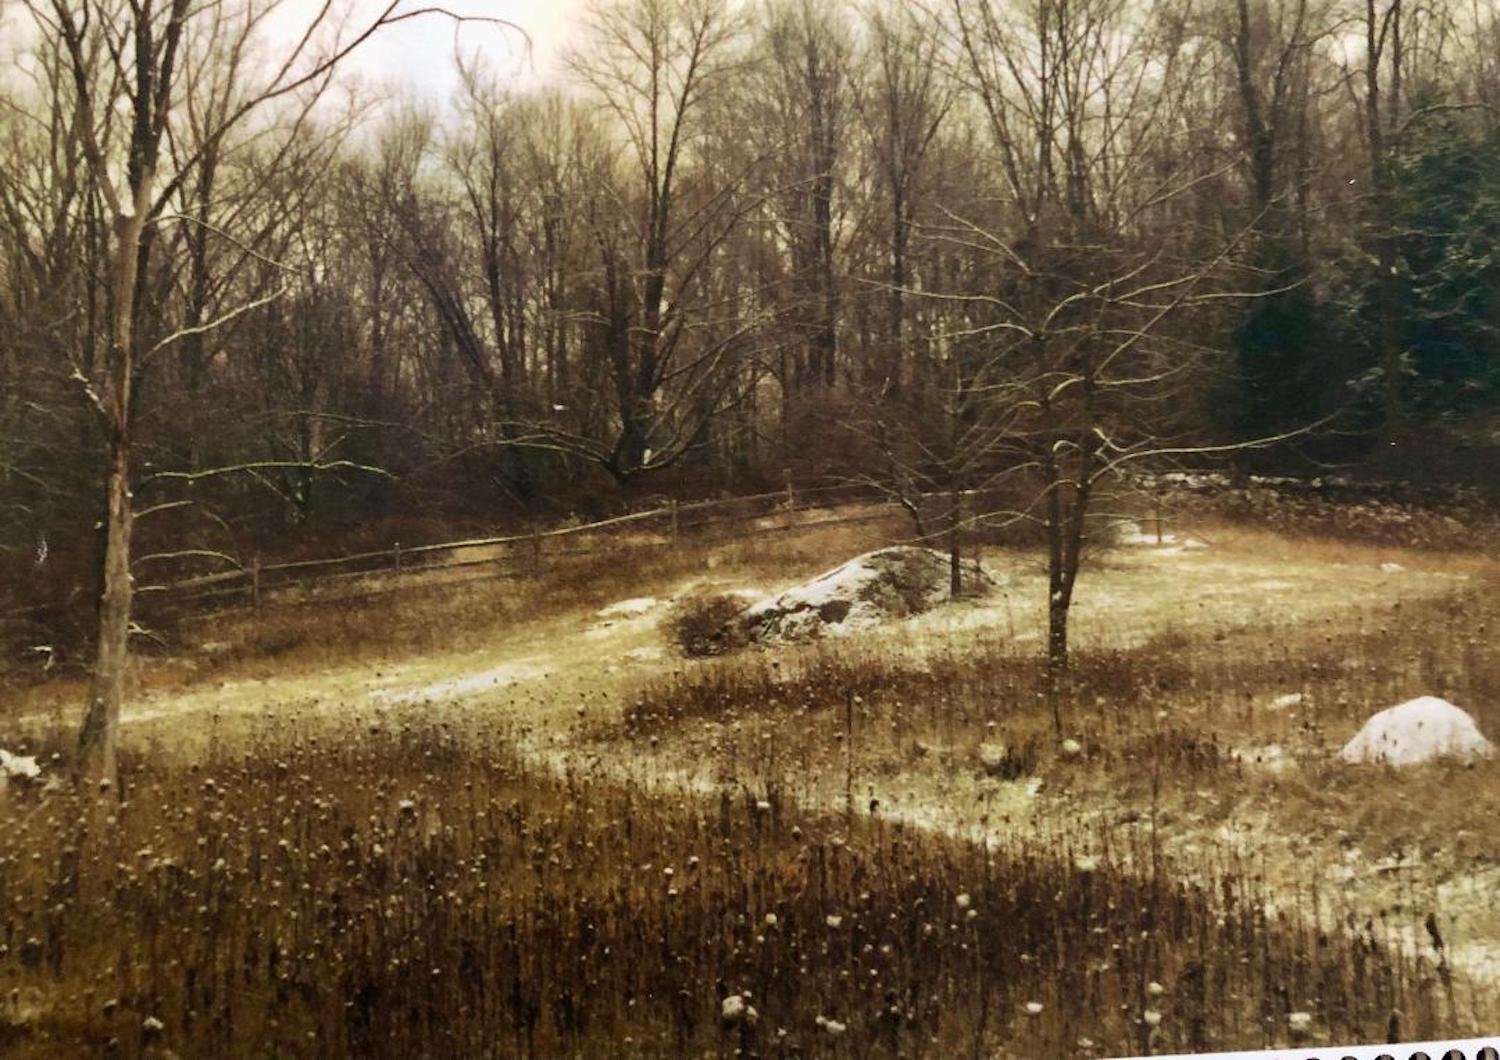
My plans were driven by a longing for adventure and romance. That sounds rather lascivious doesn’t it? Let me explain. My love affair with garden rooms goes back to our previous house (our realtor referred to it as a ‘farmette’). Nestled into 5 acres of Connecticut farmland, it was a glorious spot I grieved over after we moved. Aside from the gardens, meandering along the mowed paths in our meadow were magical adventures. I could make my way through swathes of Queen Annes lace and milkweed to Adirondack chairs in the clearing, keep going around the barn to the shaded arbor or cross the hidden bridge into the next field.
Whatever path I took, there was always a new adventure waiting, and trust me - there was plenty of romance along the way.
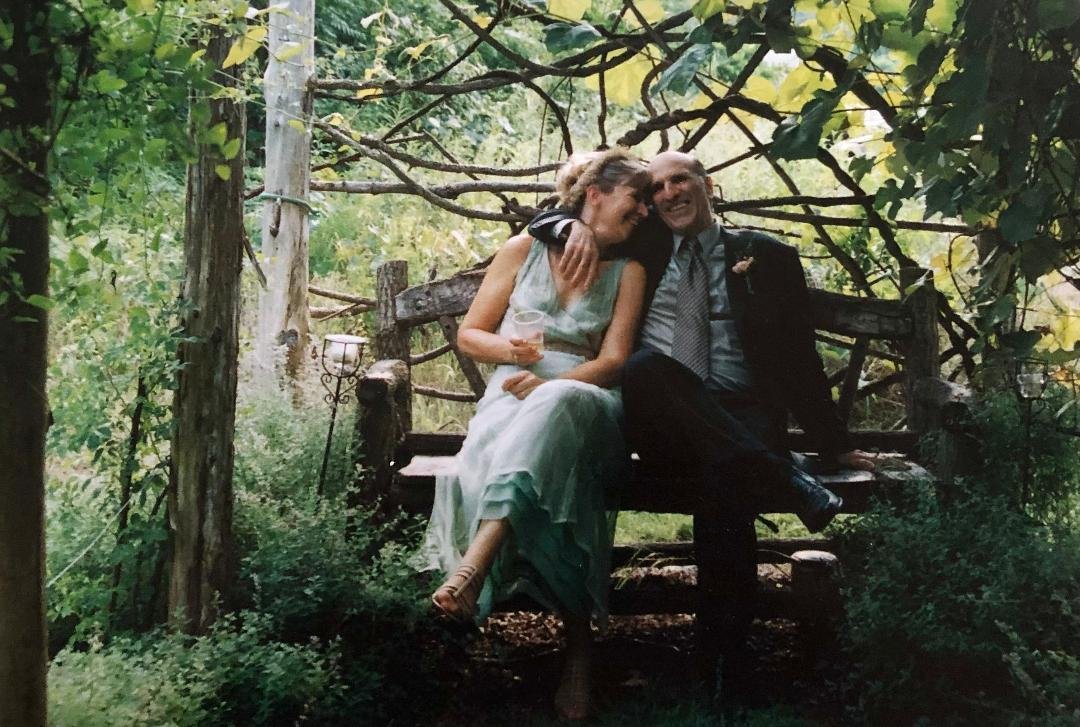
Toasting our wedding celebration under the grape arbor.
I was beyond depressed after we downsized to a cottage on a small rectangular lot. I had no idea how I was going to introduce any magic into a spot that sported only pathetic looking grass and a few weedy trees. Spurred on by the memory of meandering paths, I embarked on creating a series of garden rooms, with the idea of connecting them with paths that would lead around the house.
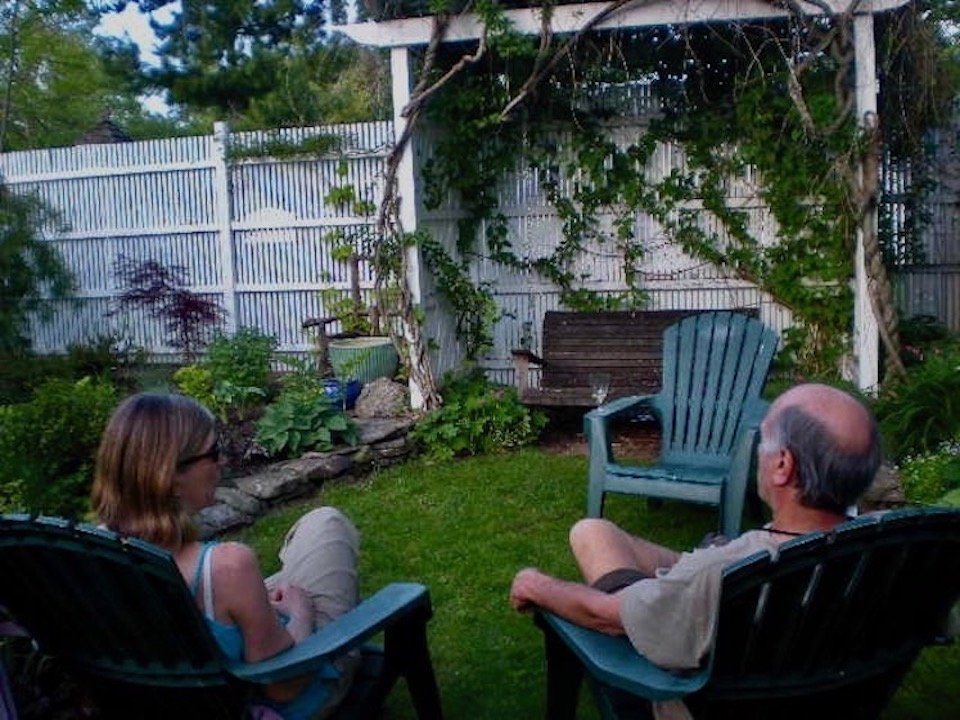
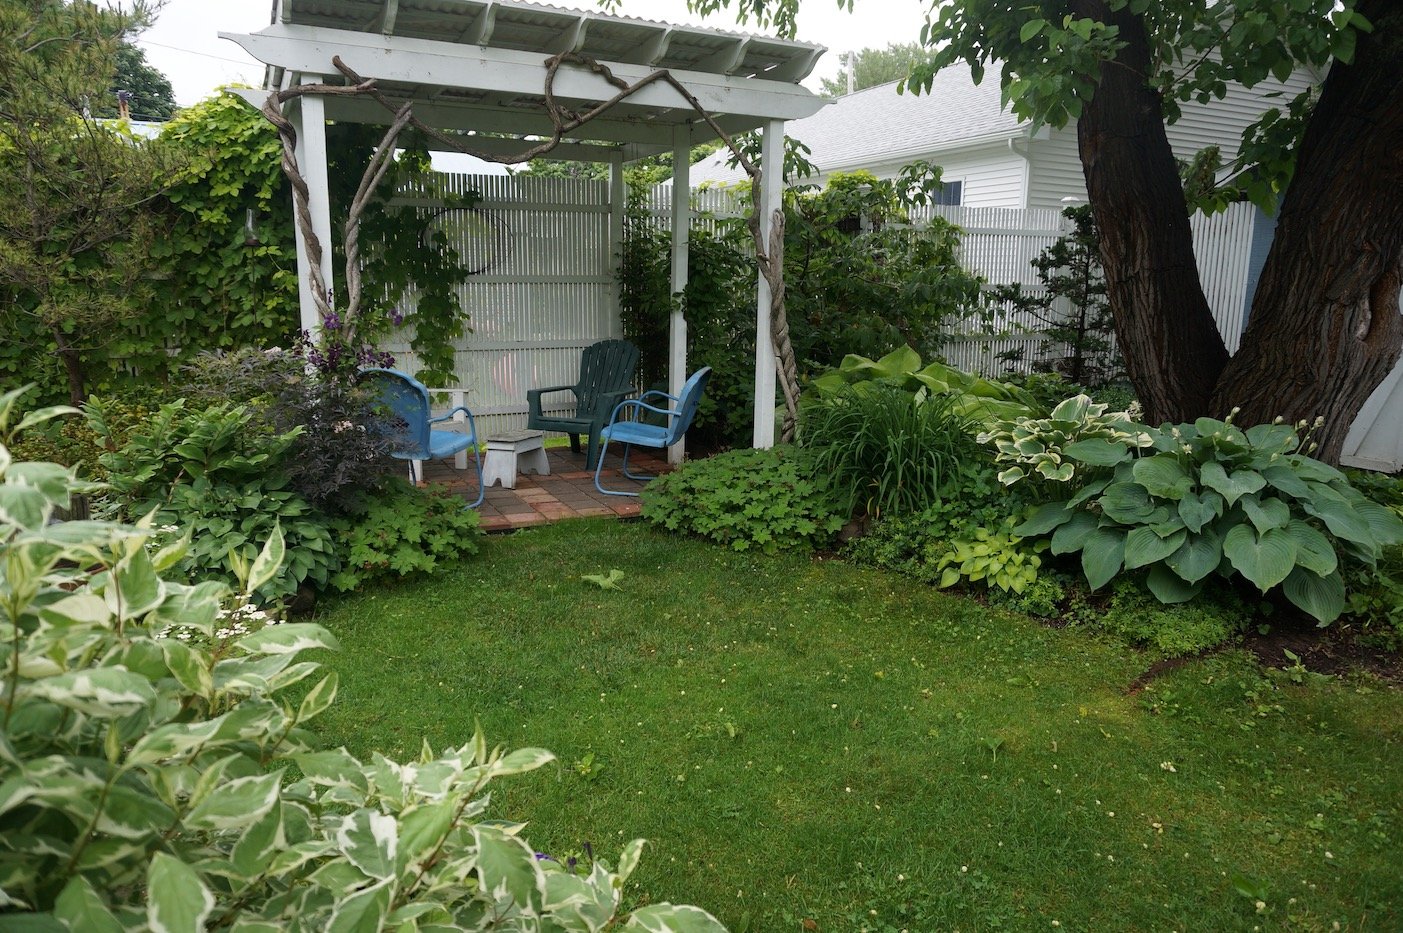
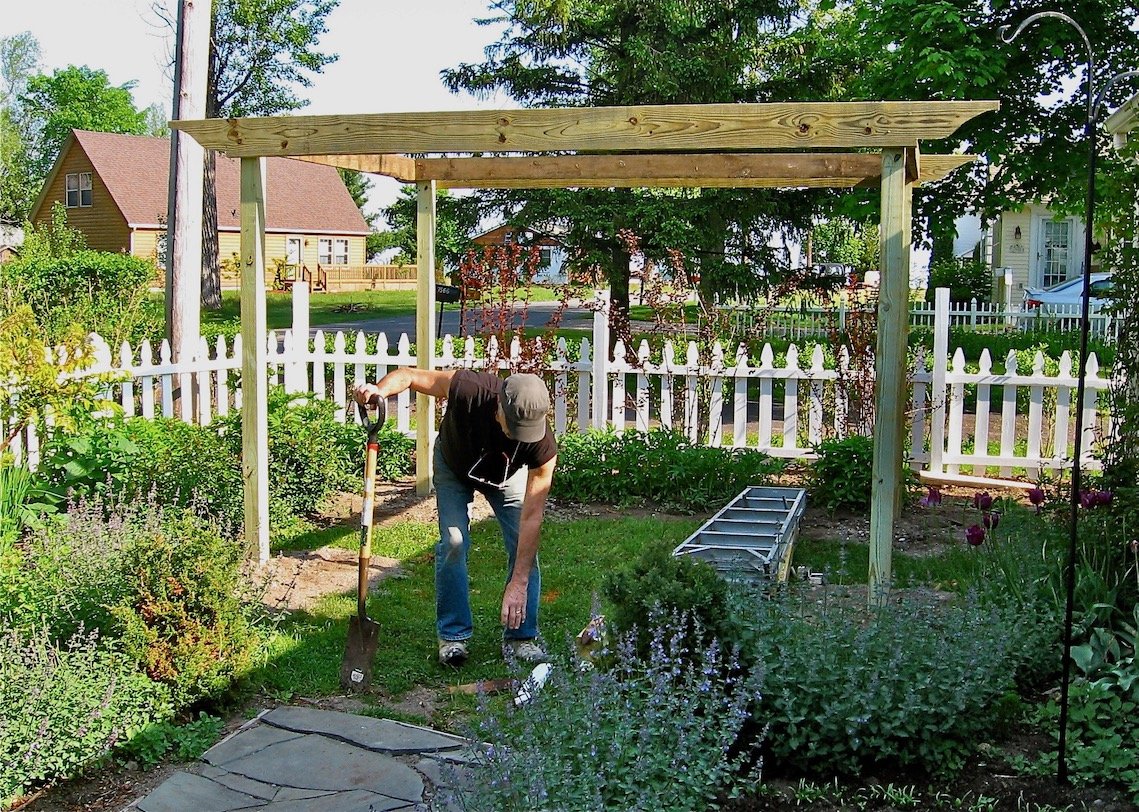
Where to start? I figured we’d be hanging out in the backyard most of the time so I began there. My husband Phil built the fence and arbor you see in the photo below. It’s definitely not romantic at this point, I called it the ‘may I help you room.’
Lesson 1: Viewpoints
The experience of walking through or into a garden is much different than sitting in it. I took note of what it felt like to lounge around in this one. A bunch of ugly eyesores immediately came into view, so I considered how to obscure them. It also made me think about what I wanted to see or smell. These observations helped me figure out what to plant and where to put key focal points. I planted like a madwoman, and surrounded the structure with layers of trees, shrubs and perennials to make it look more inviting.
Early days. I decided on more comfortable furniture after sitting on that hard bench!
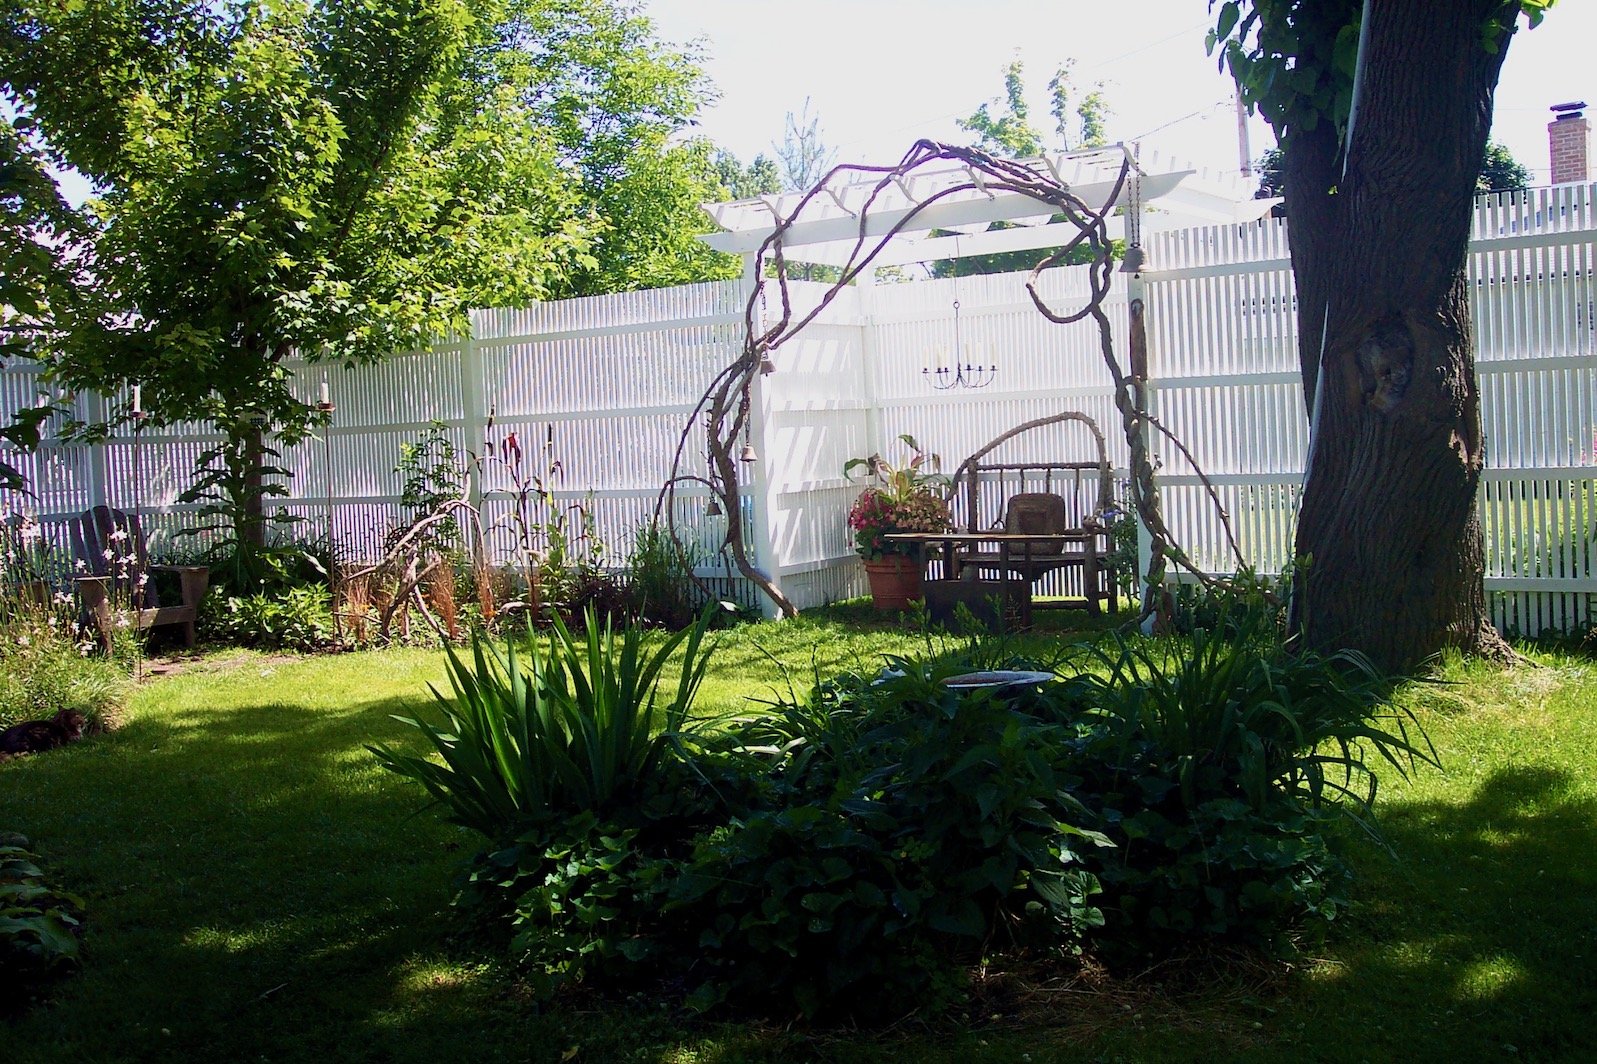
Here’s the next iteration. I planted vines up the fence in hopes of getting them to climb onto the arbor. Paving underneath made it easier to maintain. I think it looks more deliberate and it’s certainly neater. Plantings draw you into the arbor and enclose you once you’re in it. We nicknamed it ‘The Fort.’
Lesson 2: Invitations
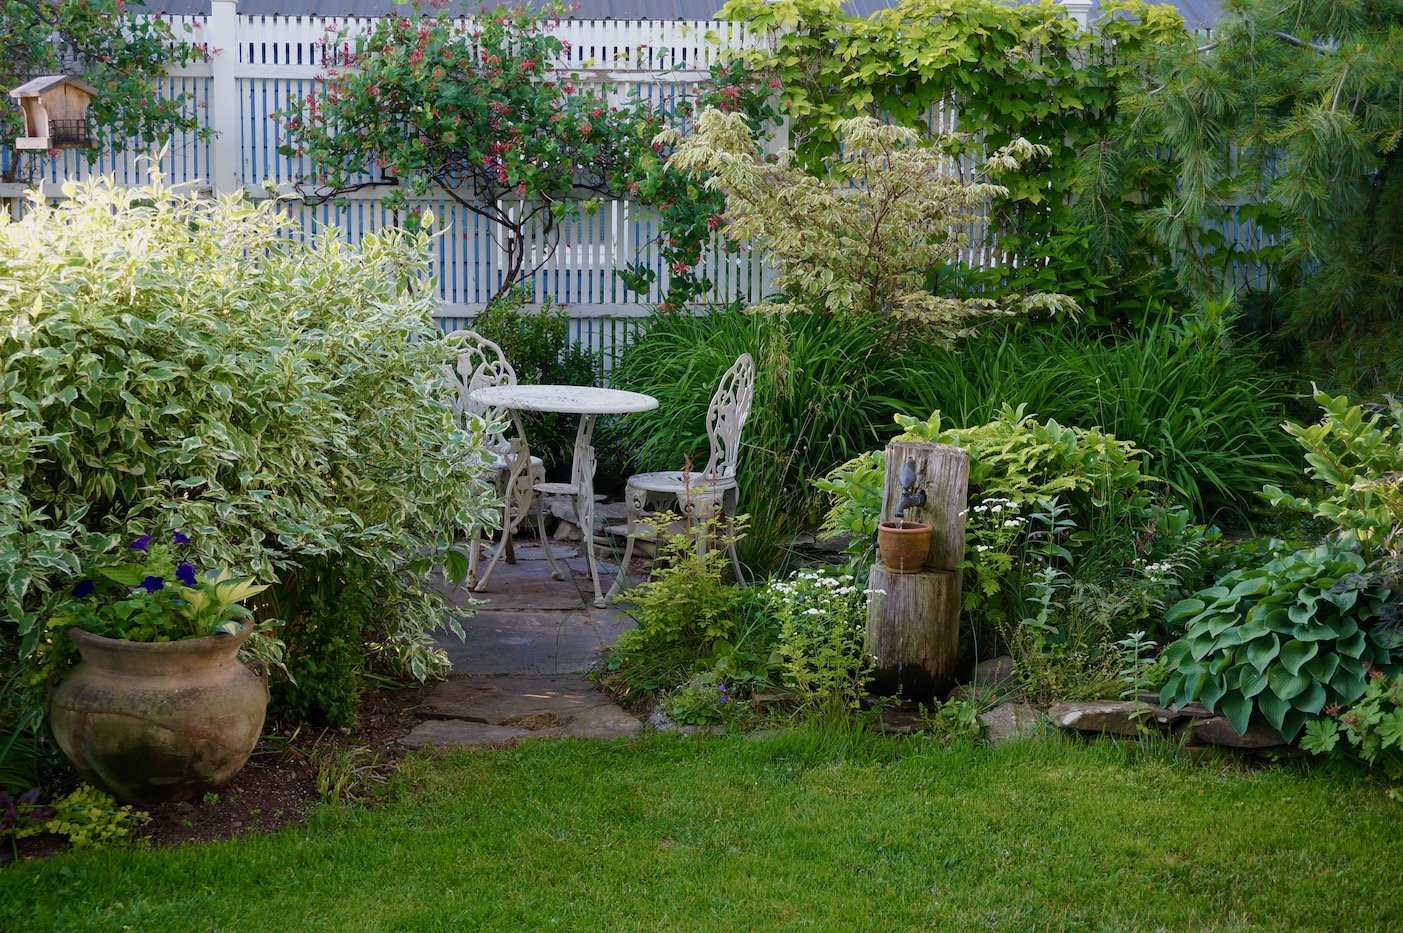
Here’s the area next to it (previously under the tree in the first photo of this spot). We refer to it as ‘The Nook,’ a good destination for morning coffee breaks and contemplation because the sun doesn’t hit it til around 11am.

A water feature put together with scrounged materials. The sound of splashing water adds to the peaceful feeling of this spot.
The container and fountain invite you into this garden. I packed it with lots of textural details because it’s a partially shaded area that makes continuous color combinations challenging.
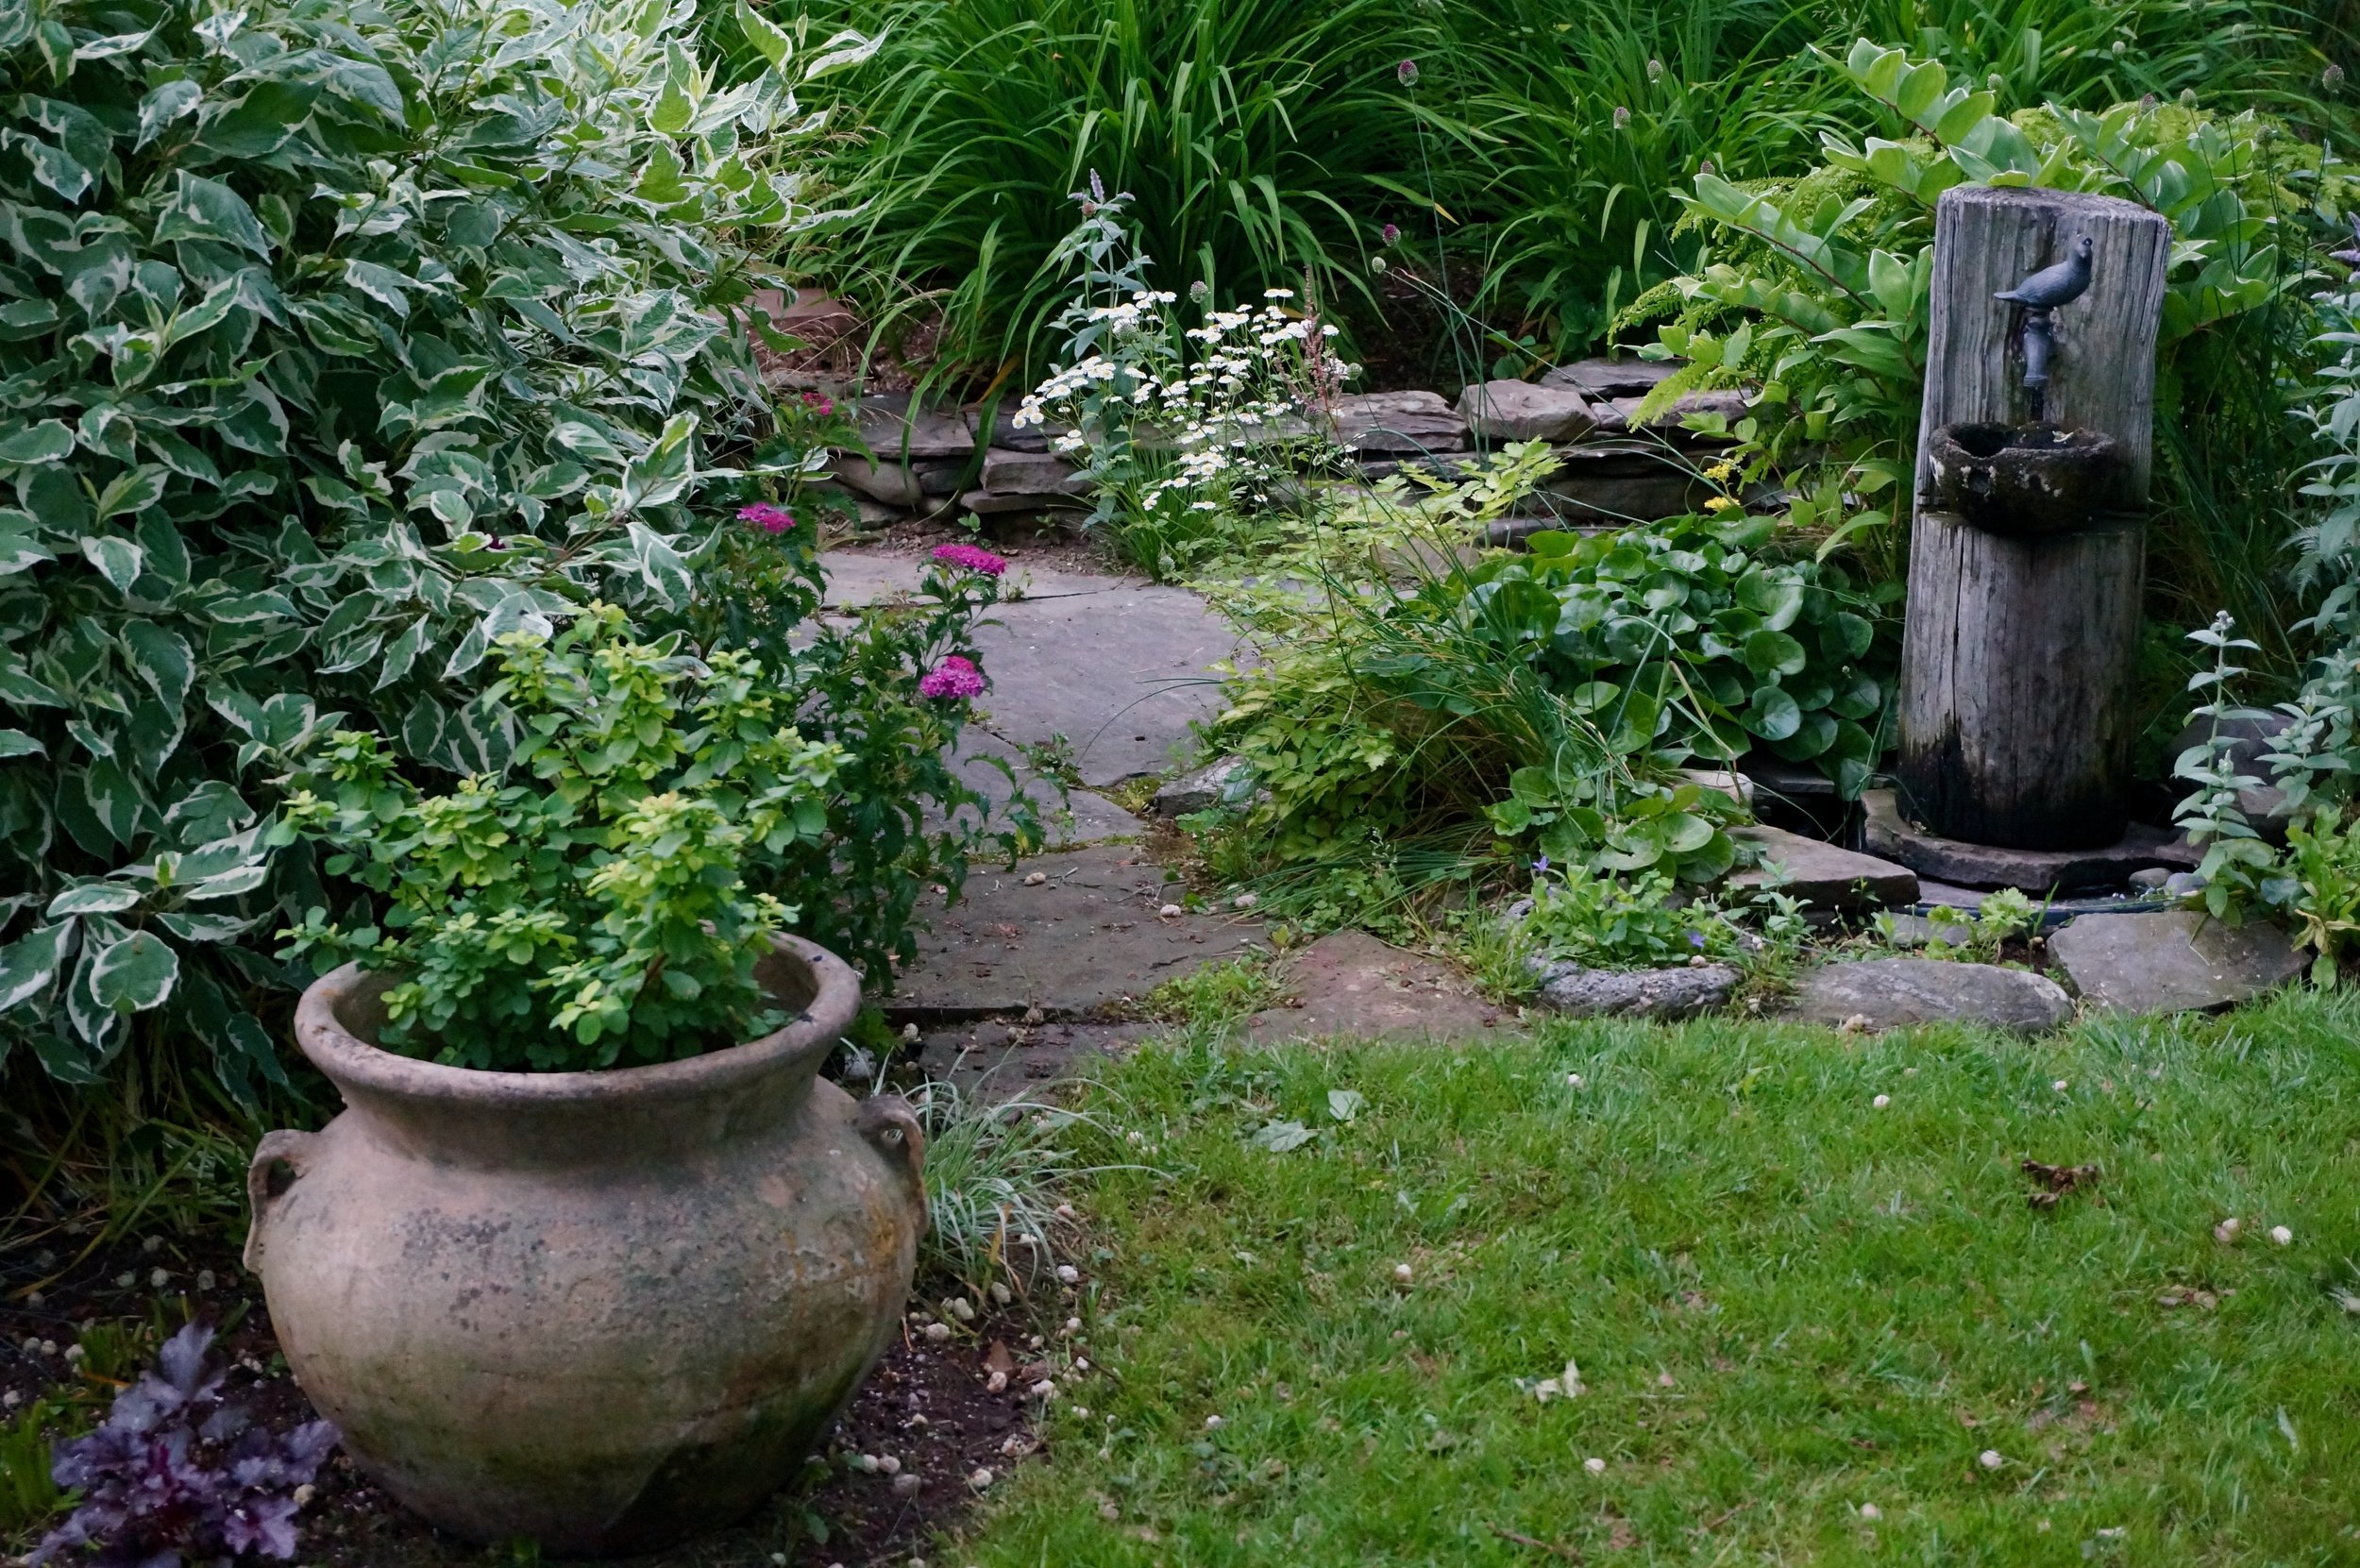
Honeysuckle and golden hops adorn the fence. I love the way it looks, but I wish I hadn’t planted the hops - it’s way too aggressive.
Lesson 3: Function and Beauty
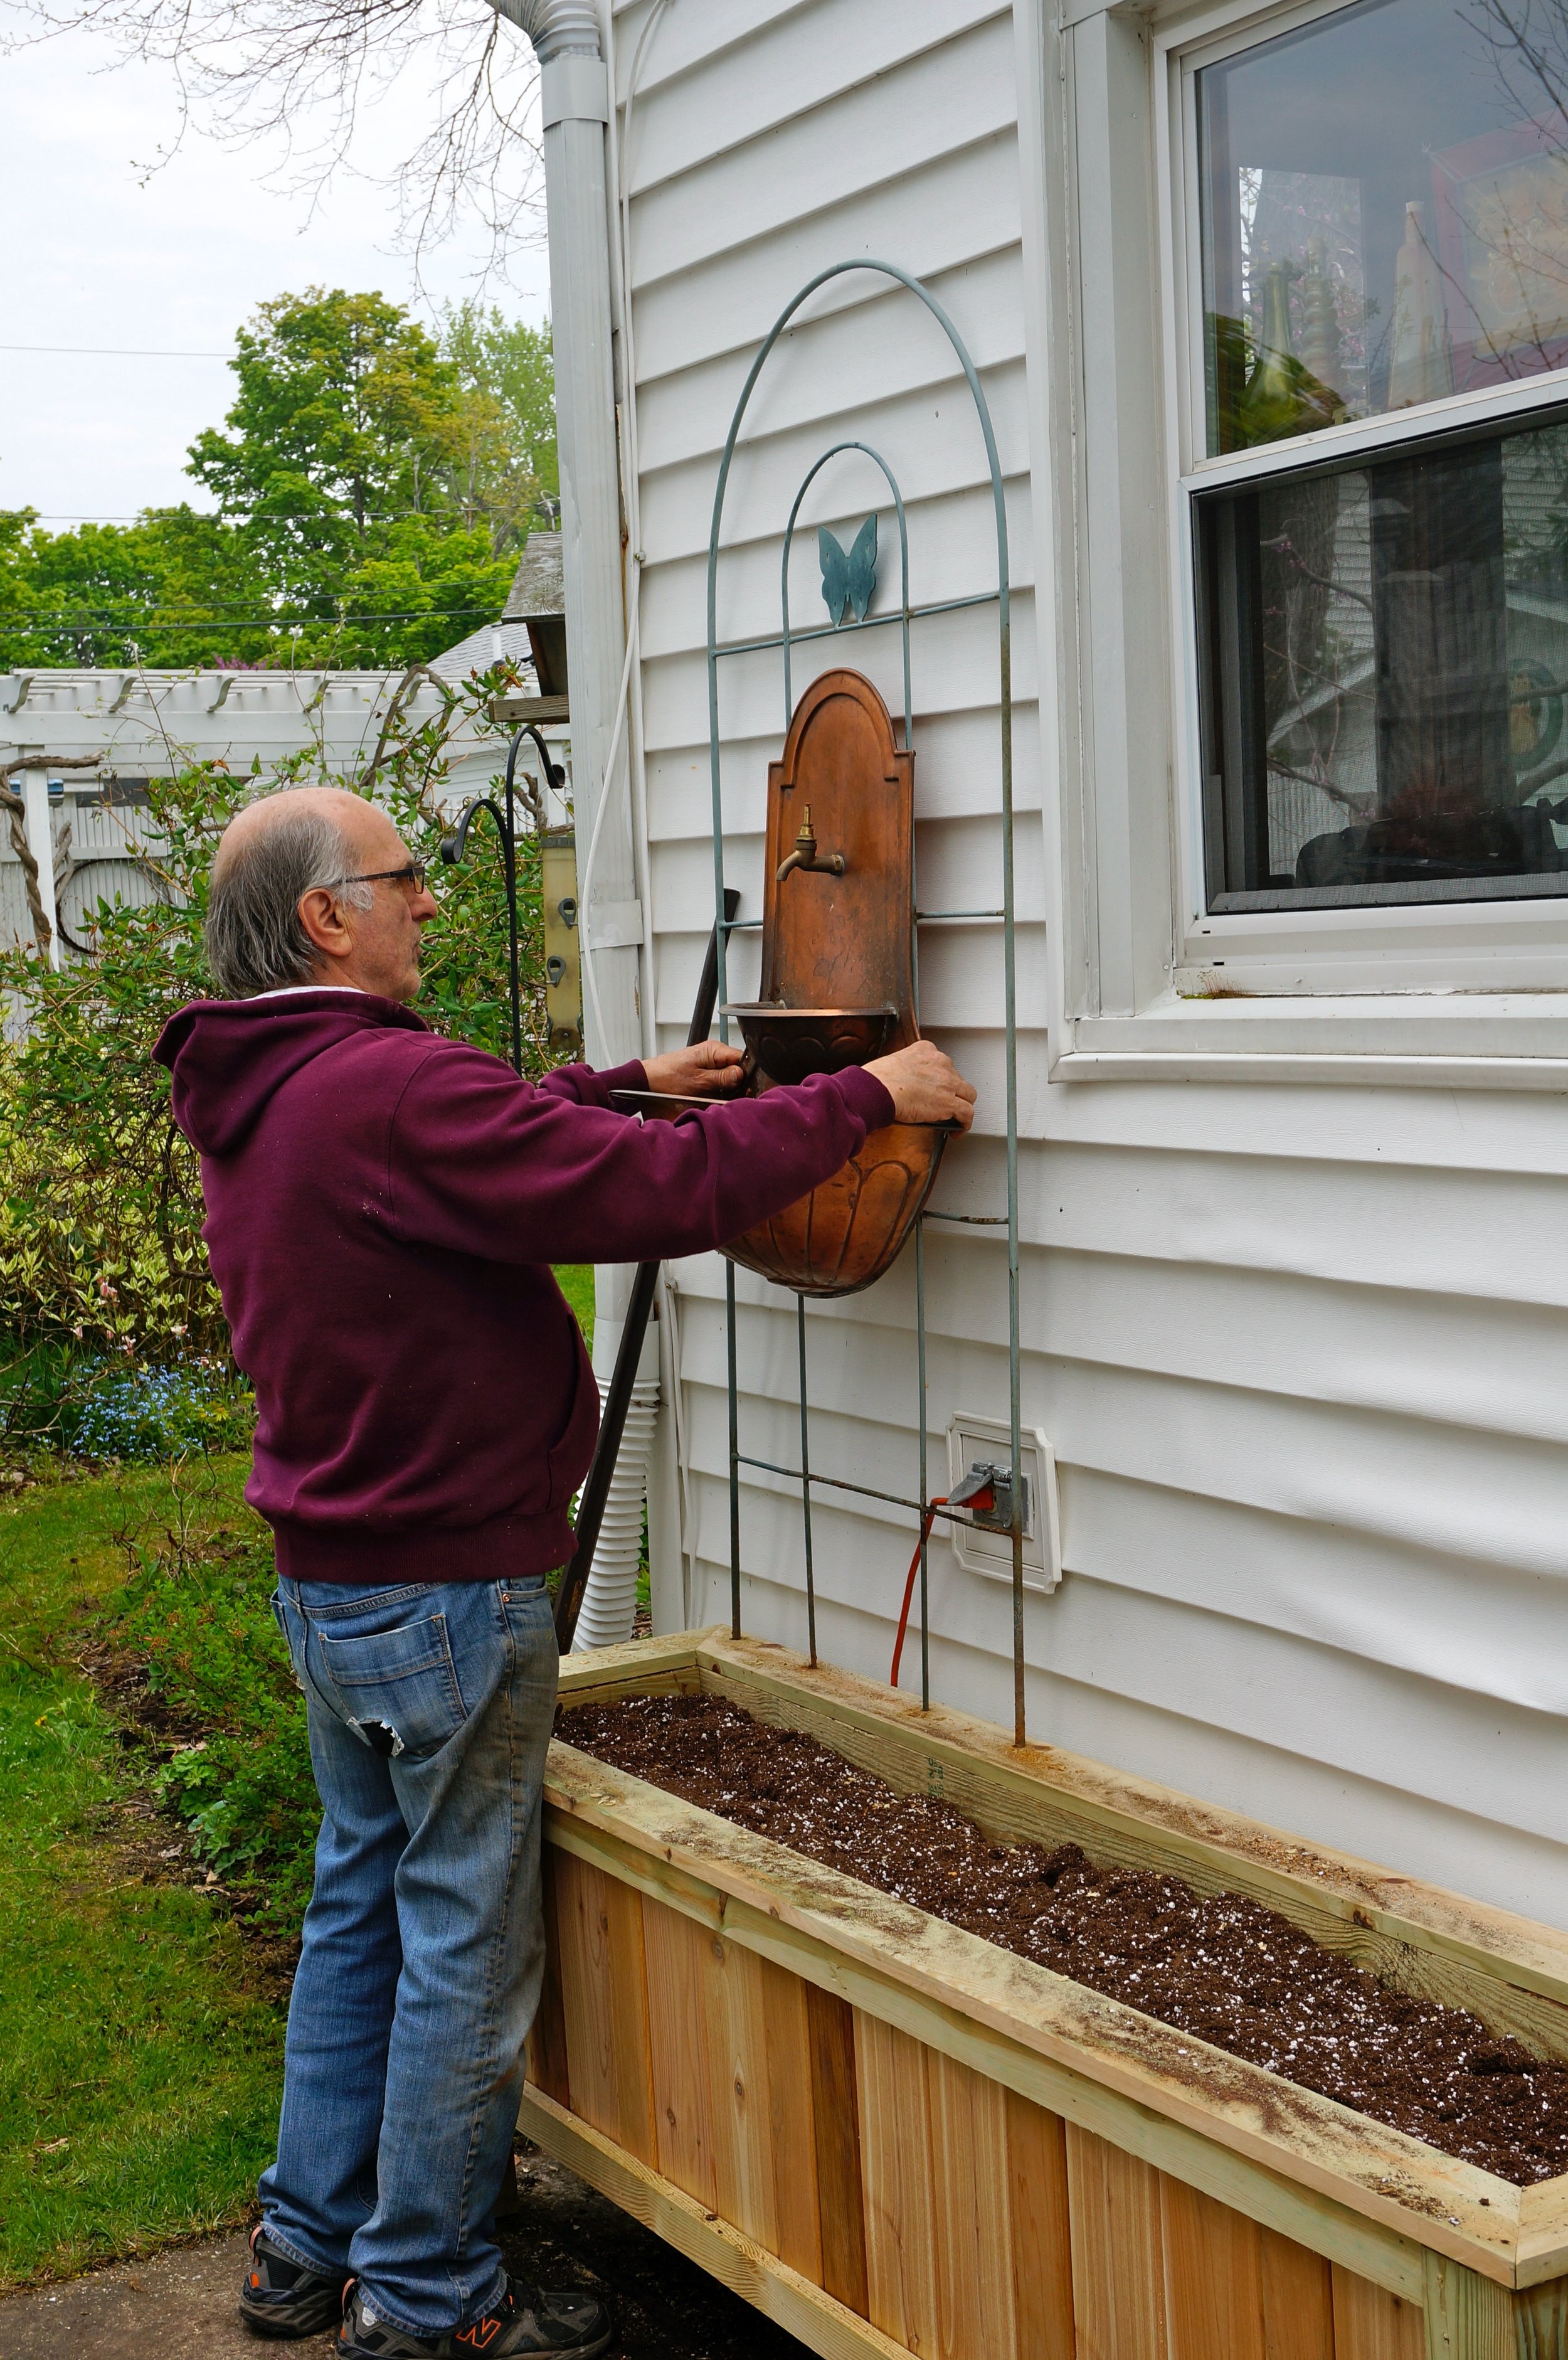
Next stop - the patio. I truly struggled with this mess. I tried to offset all of that white siding with planted containers, but it always looked sloppy and I tripped over them. I envisioned outdoor dining, but there wasn’t much room for a table and chairs.
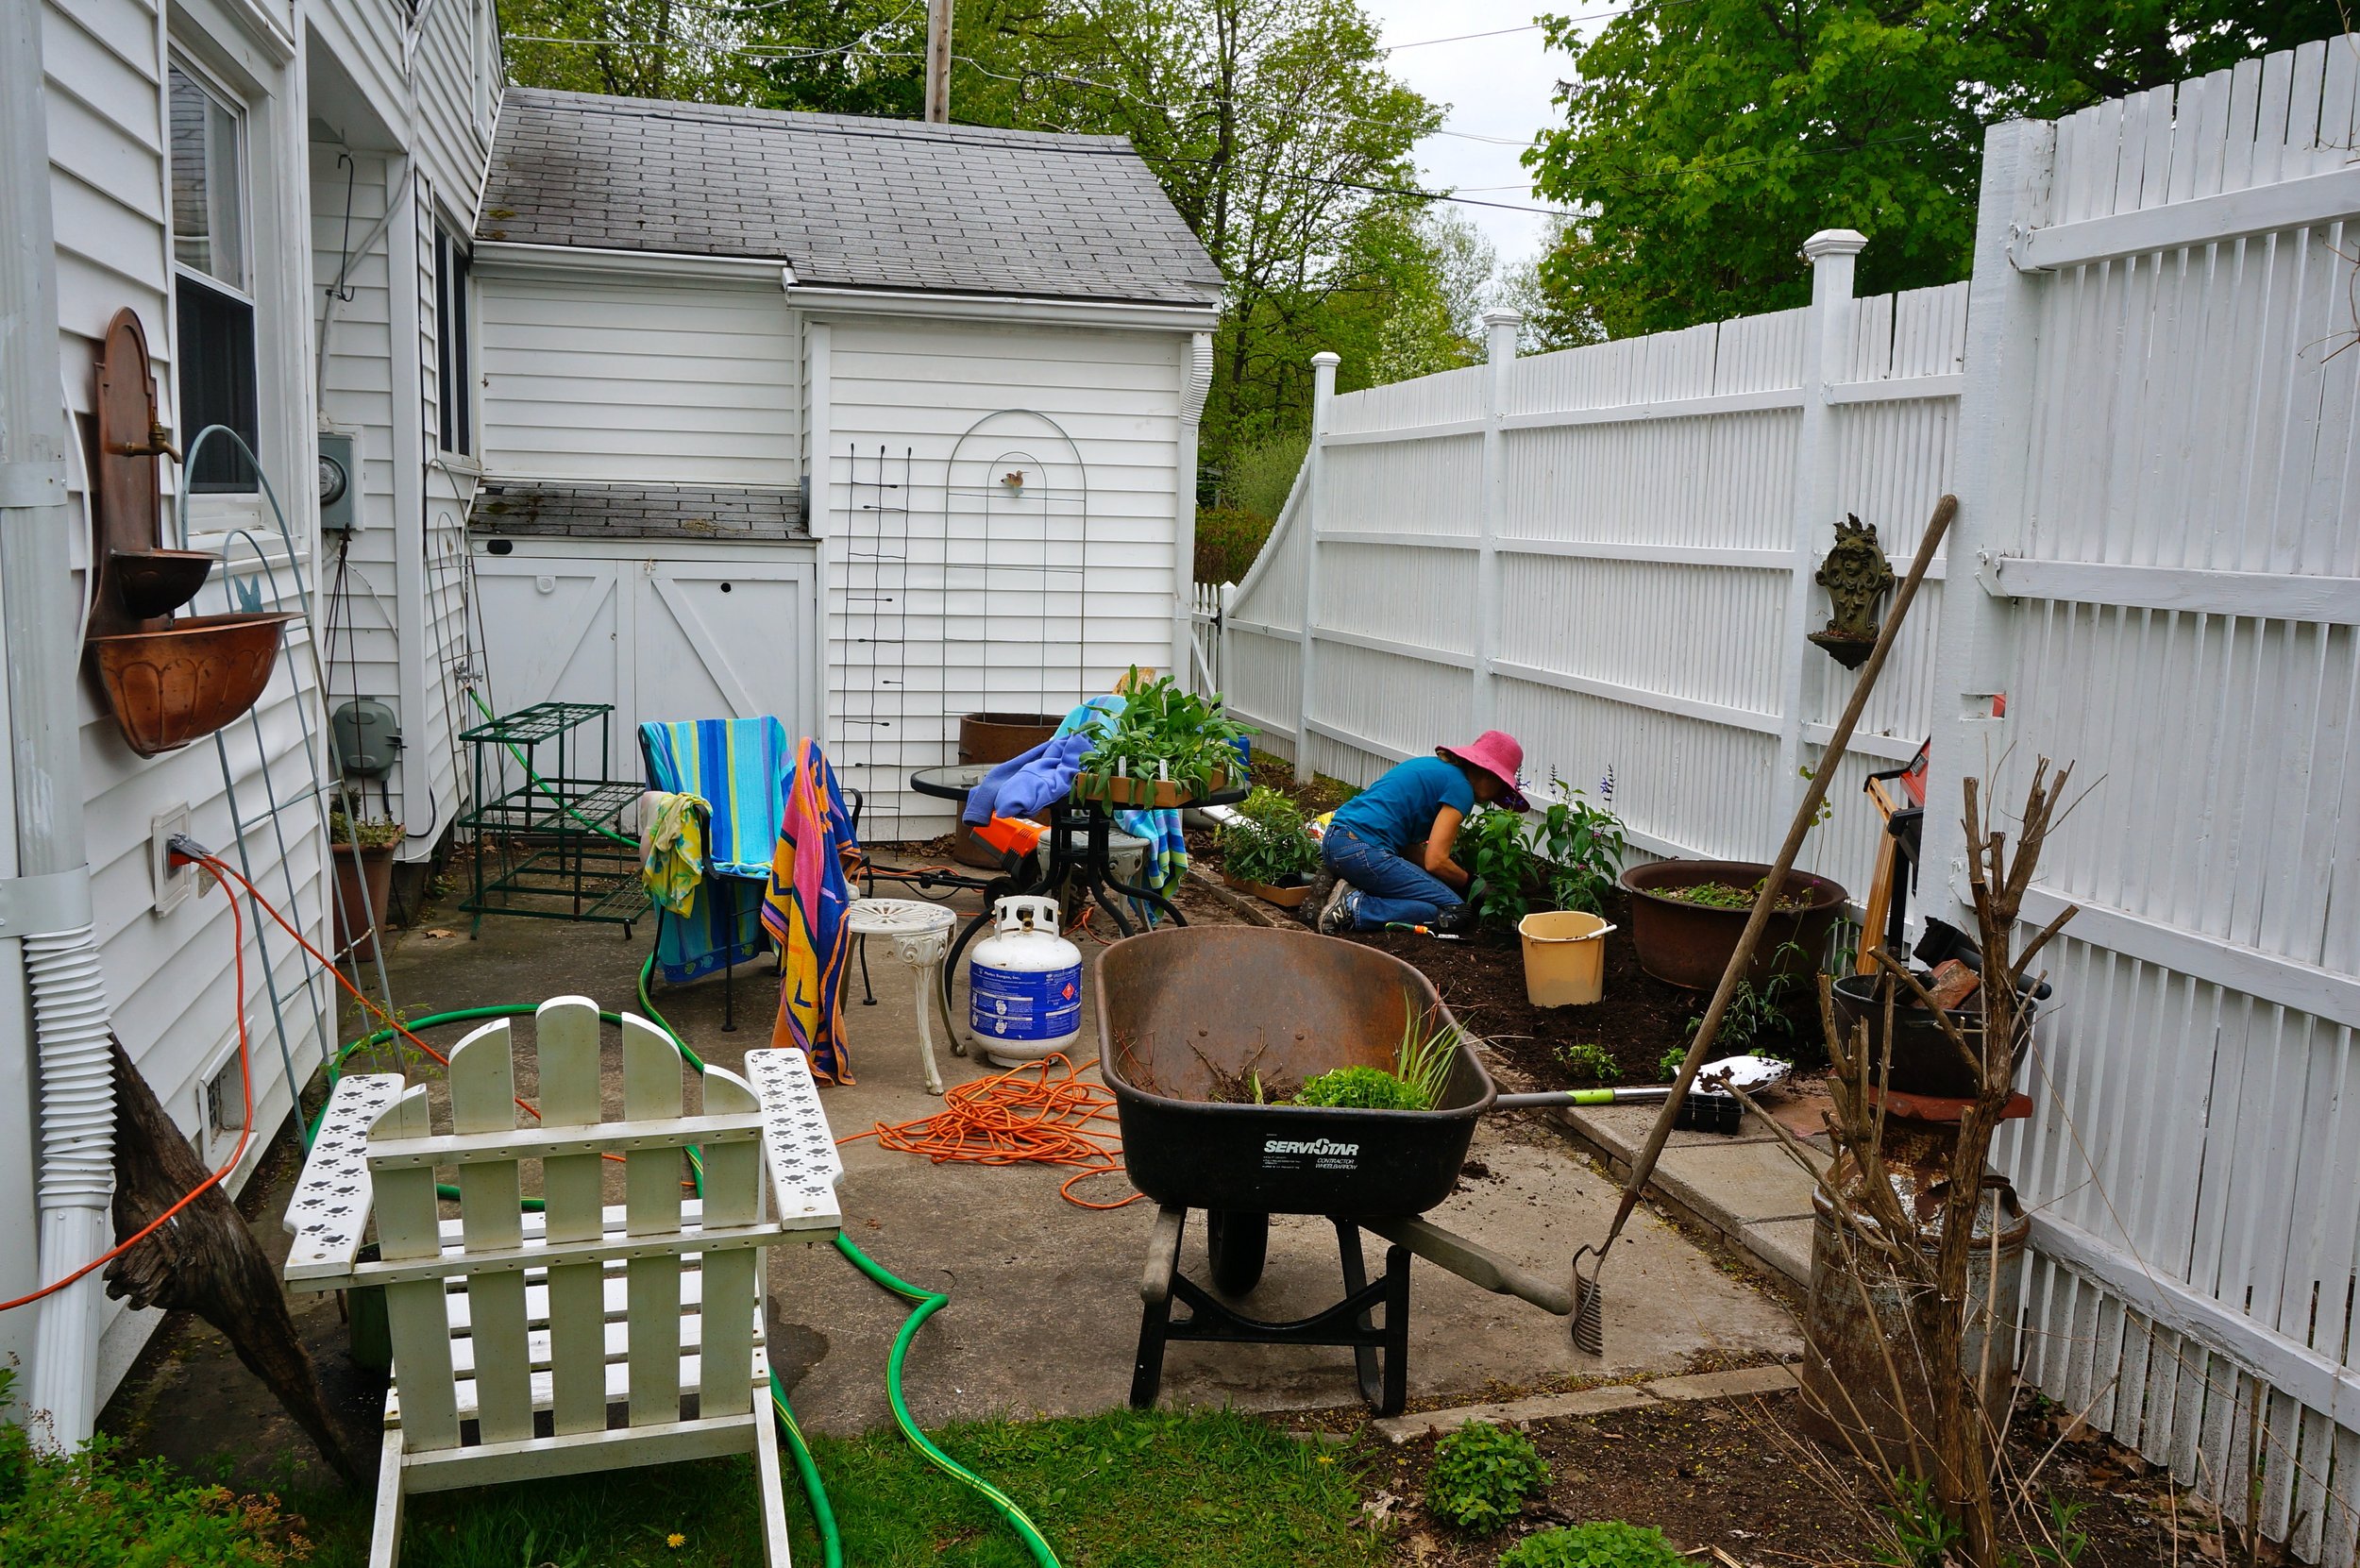
The only solution I could see were some different types of containers. Phil put together several long narrow boxes and placed them up against the sides of the house to allow more room for planting. A wall fountain offset some of the neighborhood noise and added a little ambiance. Trellises were a huge bonus that helped cover that blasted white siding.
The transition from the patio to the backyard is a lot more fun now. We have plenty of room to walk around, and climbing vines cover most of the siding.
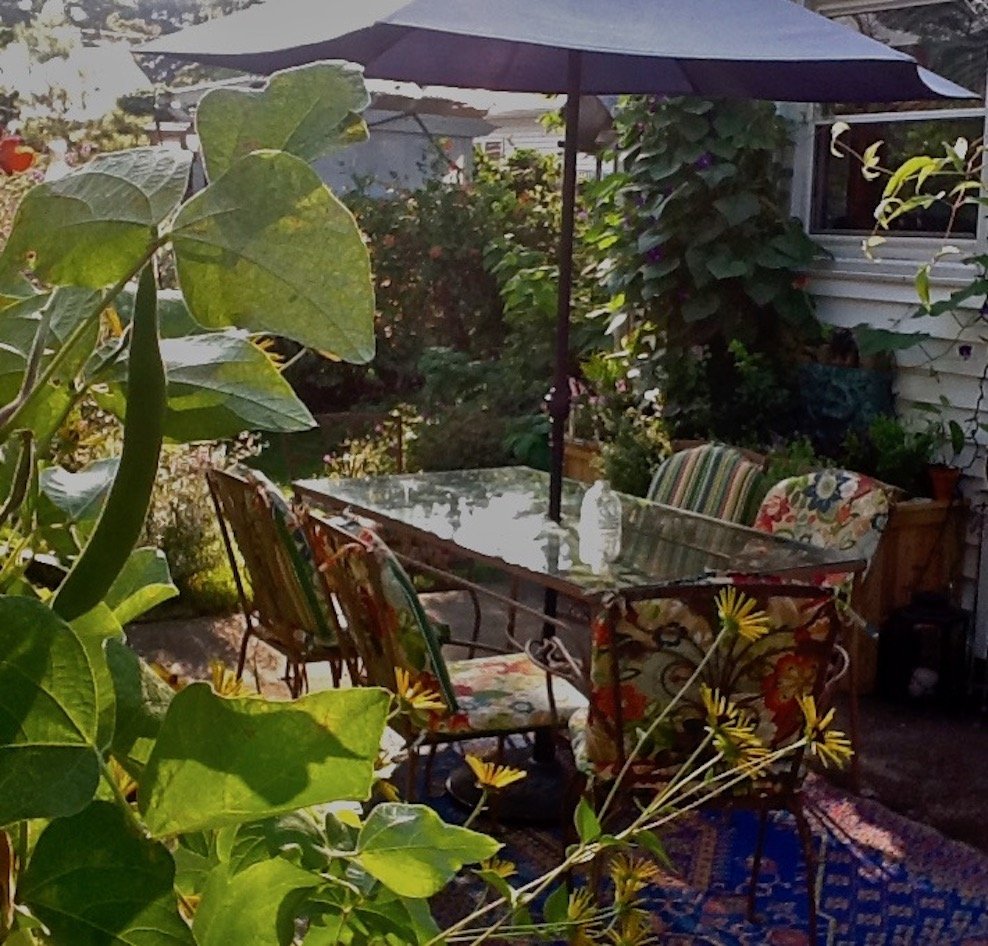

Here’s the view as you walk from the backyard to the patio. We dubbed it ‘The Red Grill Garden’- named after the flashy red Weber grill Phil picked up at a tag sale.
Lesson 4: Location counts - think about how it feels.
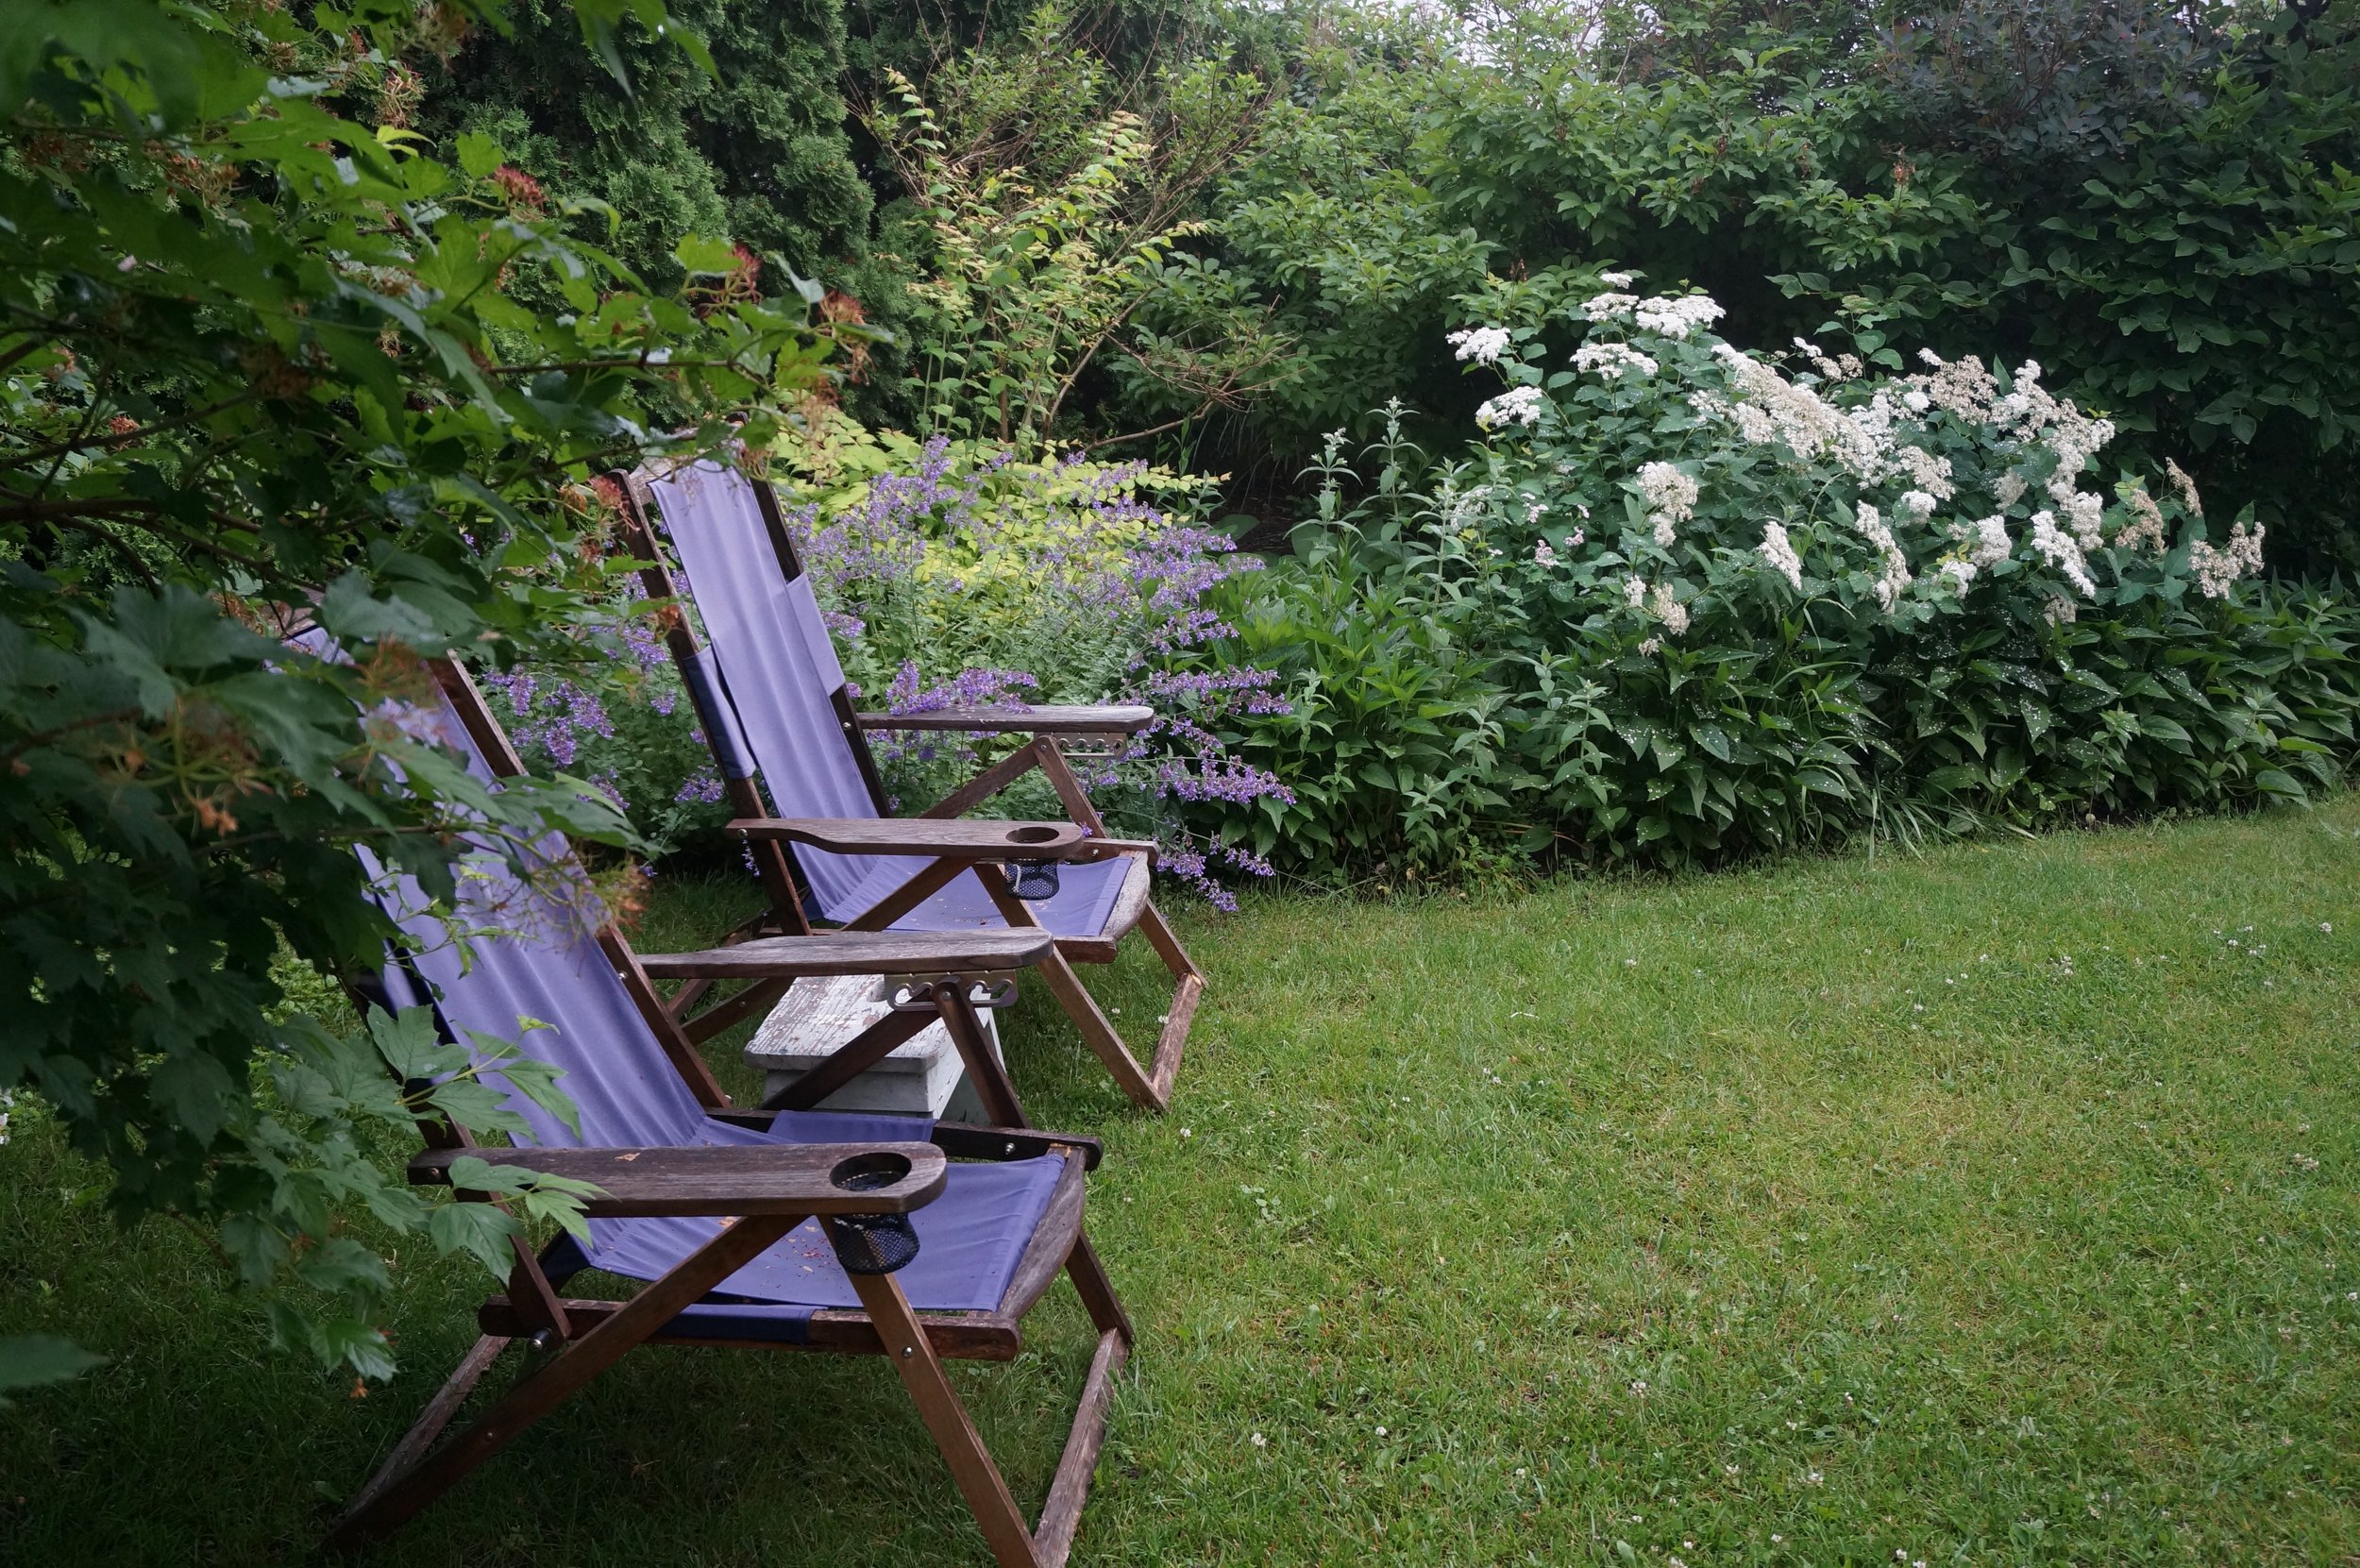
On the way through the patio, back and side yards I wanted the feeling of a continuous journey. I didn’t think there needed to be a garden room in every location, but I wanted to have a stopping point at each turn. Below is a shot of the side yard. I planted the borders in back to screen off the road on the other side and added the little table and two chairs. The fact that I never wanted to sit here was a pretty good indication that it made no sense. The table and chairs look like they were just plopped there - and honestly, they were.

It took me awhile to install more comfortable chairs and pick a better spot. Instead of sticking out like a sore thumb, they’re nestled into the plantings now. No one can see us from the sidewalk on other side either, I’m often privy to the neighborhood gossip as people walk by.
Lesson 5: Use hardscaping to impose order
When I finally got around to the front entrance I wasn’t sure what to do. This exposed rectangular area had terrible soil, and I can’t begin to tell you how many plants I killed! I wanted to make it attractive, functional and fun. Below is my first attempt to pretty it up. As you can see, I went for a rustic look and tarted it up with annuals and vegetables. It was convenient to harvest and take them into the kitchen, but the mulch was a big mistake. We tracked it into the house on a daily basis. It didn’t look so hot in the winter either.

As you can see, this area is pretty sunny. Not exactly conducive to sitting right? We needed more structure and some shade. In an effort to convince Phil to build a pergola, I set up our market tent, moved the furniture in and served wine and cheese at the end of the day. I won him over by the end of the summer.
Yes, it looks a little funky but it worked. I rest my case for sitting in a space til you figure out what to do with it.
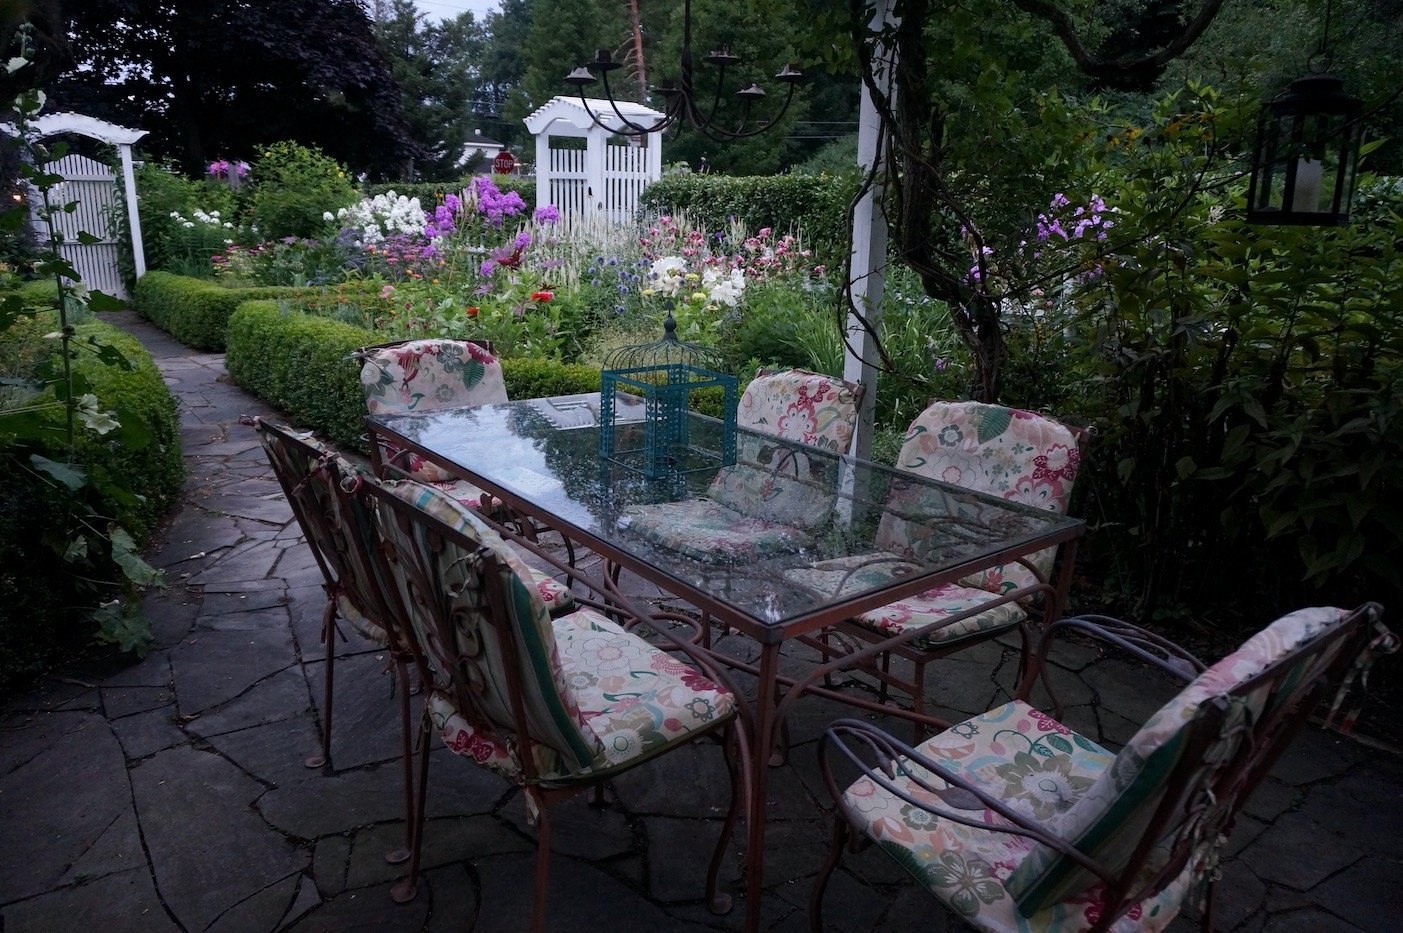
We both agreed (somewhat grumpily) that the bluestone walkway needed to be extended to a patio underneath the pergola.

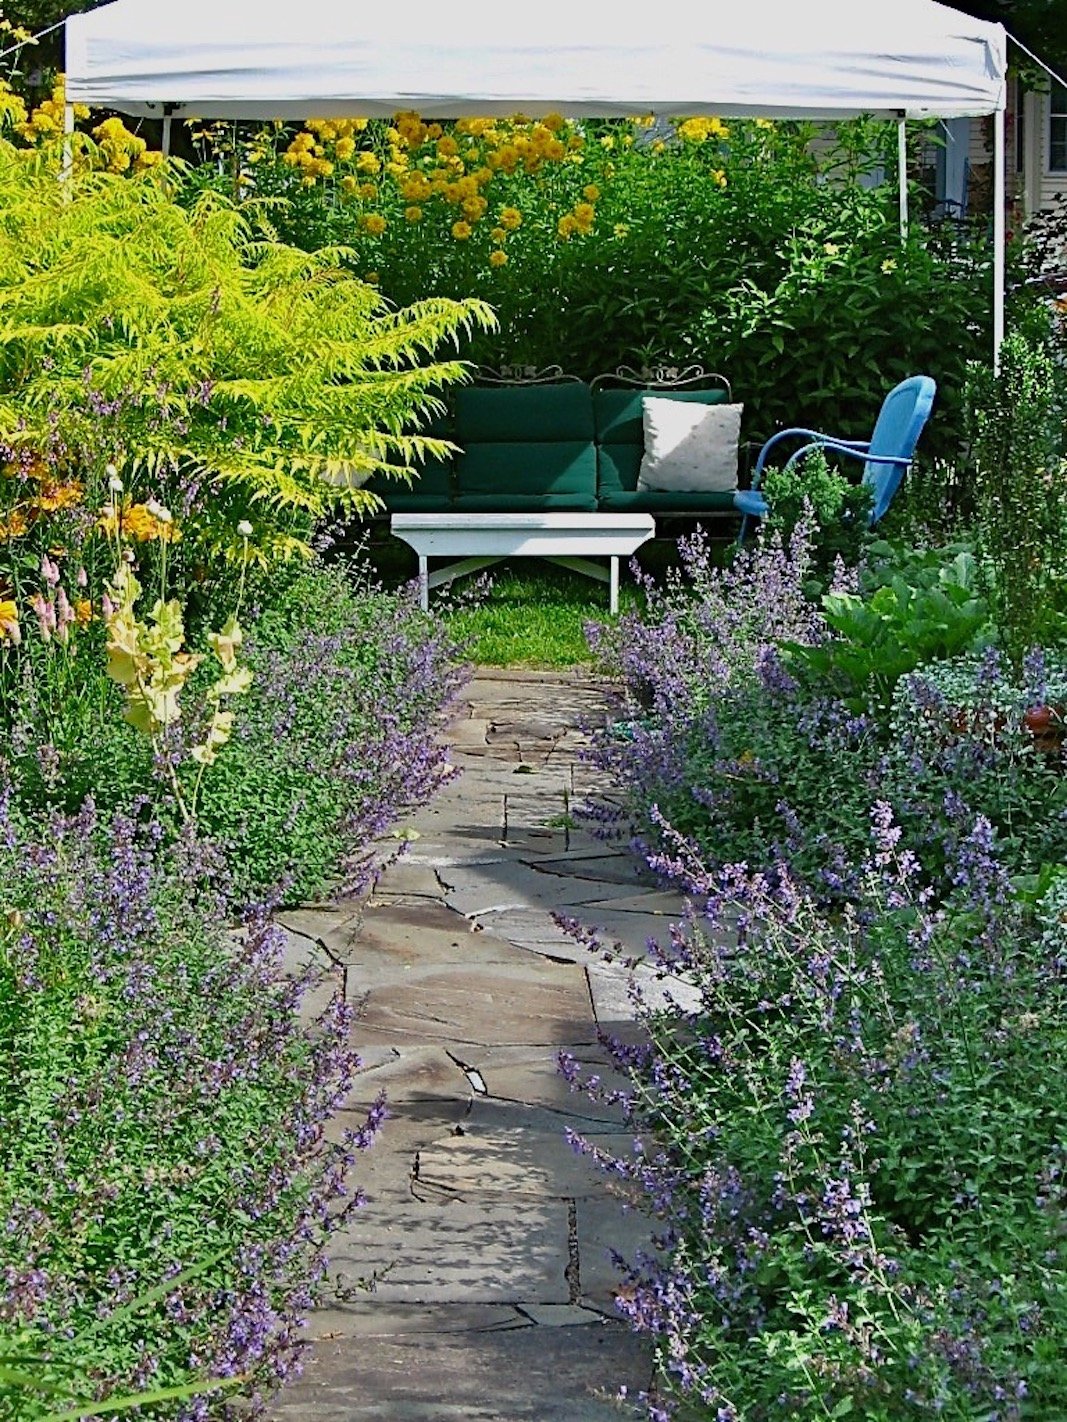
This area went through many iterations of planting and furniture grouping, but the structure of the boxwood hedges, arbors, pergola, path and patio are the glue that hold it together. From the entrance at the other end of the garden, the urn is an ideal focal point.
Lesson 6: Don’t be afraid to change things
Believe it or not, after all the work I did to make the patio aka ‘Red Grill Garden’ a pleasant place for dining, we hardly ever ate at the table I bought. It just wasn’t comfortable - at least for dinner. No matter how we moved the umbrella, the sun was always hitting us in the eyes. It occurred to me that the front garden might be a missed opportunity, so I moved the table and chairs into it. OMG, I can’t believe it took me so long to do this. It’s perfect, and it’s become our summer dining room. We moved the red grill in and named it ‘The Bistro Garden.’
Lesson 7: Make it big enough
My only regret thus far is that we didn’t make some of our garden rooms bigger. I wasn’t thinking ahead. Cozy little nooks are great for two people, guests require more space.
Lesson 8: Patience and vision
In my experience, patience comes and goes. Vision isn’t always so clear. Bottom line? It’s all about how it feels.